Showing posts with label good eats. Show all posts

Sunday, September 21, 2014

Honey Wheat (no knead) Dutch Oven


  • 1  1/3  cups lukewarm water (approximately 100 degrees)
  • 2  1/4 t.  granulated yeast
  • 2  1/4 t.  coarse salt (.6 oz)
  • 1  1/2  cups whole wheat flour (6.75 oz)
  • 1  1/2  cups  all-purpose white flour (7.5 oz)
  • 1/8  cup of vital wheat gluten ( 2T or .6 oz)
  • 1/4  cup honey (2.8 oz)
  • 1/4  cup lard (melted and cooled) (1.6 oz)

Using glass bowl or cup, dissolve yeast in lukewarm water.  Put wheat flour,  all- purpose flour and gluten into large plastic mixing bowl, incorporate salt into flour.  Using a wooden mixing spoon, add water with yeast, honey and melted and cooled lard to flour mixture, making sure everything is uniformly moist.  Dough should be wet and loose enough to conform to shape of container.  Cover with a loose fitting lid.  Allow mixture to rise for approximately 1  1/2  to  2 hours, depending on room temp. and initial water temp.  Longer rising time (even overnite) will not harm the result.
You can use a portion of the dough any time after this period.  Divide in half for 2 loaves. Recipe can be doubled for 4 loaves.  Any dough not initially used can be refrigerated in same bowl with loose lid for up to 14 days.
To bake a loaf of bread, sprinkle flour on work surface, divide with your hands a grapefruit size portion of dough, dusting a bit of the flour on the outside of the portion of the dough, not really mixing any of the flour into the dough.  Most of the dusting flour will fall off.  Gently stretch the surface of the dough around to the bottom on all four sides, shaping the dough into a ball.  Then stretching in gently to elongate it and taper the ends.   No kneading required.  The entire process should take no more than 20 to 40 seconds.   Place on parchment paper, cut to size of dutch oven.  Cover loaf with towel and let rise for 40 mins.
Before placing in heated oven, dust with flour and make 3 slashes, 1/4 inch deep, across the top, using a serrated knife.  ( If refrigerated dough is used, allow more resting time before baking).
The method of baking to be addressed here is to use a cast iron dutch oven (10 or 12 inch size).  One of  3 methods can be used for baking.  At home in your kitchen oven; or outside using either charcoal or wood coals.
While dough is rising, preheat dutch oven to approximately 500 degrees.  Use a trivet in bottom of oven, and preheat with lid on.  When temp is reached, carefully place dough (with parchment paper on bottom) in oven and replace lid.  Use insulated glove while doing this.
Bake for 35 min. at 450 degree.  When using indoor oven, remove lid for last 5 mins.  Carefully remove loaf  from oven and place on cooling rack.  Slice at will.

Wednesday, October 23, 2013

Hardtack, The Recipe and Practical Uses

As I walk you through making Hardtack, I wanted to show some pictures of the process but I want to tell you a little bit more about this staple.

Hardtack has been made and used for centuries by many types of people including Sailors, Pioneers and Travelers. It is a type of cracker, that when made properly, can be stored and last forever. On its own, it can be eaten once softened. It was often dipped and used in broths, soups, stews, beans and coffee.

HT can be carried as long as it stays dry, it can be useful. It stores really well in air tight containers and in the dark. You can use basic flour, wheat flour and for this small batch, I ground my own Wheat. You only need water and salt from here. As you can see, I made a small batch, but I suggest that you double up the recipe and make double using the same amount of energy.

Mixing 3 cups of flour, you can mix 2 cups of white and one cup of Whole Wheat, all white flour, all wheat flour, whatever suits your needs. Adding 1 cup of water or so to make a tight dough, and 3 teaspoons of salt. Here I kneaded the mix and formed a ball.

I rolled the now formed dough out after kneading it to form together.

I grew and ground my own flour as you see here. I rolled it into 1/2 thick piece.

I trimed the edges, set them aside to for and make more and began to cut them into 3 inch squares

After cutting them, as you can see they don't have to be perfect at all. Using a small skewer, I poked a bunch of small holes in them, but not all the way through.

I separated them and placed them on a cookie sheet to bake at 350 degrees for a half hour, flipped them over and continued to bake them for 30 minutes more. The general rule to tell if they are done is that they should not be soft at all, hard as a rock they should be.

Here is the final product!!!

3 cups of flour
1 cup of water
3 teaspoons of salt

Bake at 350 for 30 minutes one side, flip and continue for 30 minutes until hard. 


Thursday, August 15, 2013

My Popular Sausage Zucchini Muffin Recipe

I have been asked for some of my Zucchini recipes and what to do with this popular summer Squash. If your at work and people want to give it away, you will find most people will take a few at first, then nobody wants any more. However you can do more with it than most people know, I mean I like to get out my seasoned cast iron fry pan and mix it with Yellow Squash and Onions.

Dehydrating it is great, and I will add this same recipe made with dehydrated Zucchini Squash later. My goal is to show you what to do with it while it is fresh and everywhere you turn. If one will grow, you will get others until the plant dies. Or other people will get sick and tired of them, along with some people who grow them for fun, will just give them away....

Now I am not known for top rated cooking, okay I am a awesome trail cook and a self proclaimed Gravy Master, but there are some recipes I have gotten or I create on my own. This one was modified from a souffles recipe I made up, but it was better as a muffin. I had too many eggs on hand and was being creative and stumbled upon this idea/recipe.

From Boy Scout meetings to Swim meets, these became a family favorite very quickly. Then during parties these just disappeared and rave reviews were heard many times. If your looking to get married, remember the way to a mans heart is through his stomach. LOL... Enjoy... Jason


Sausage Zucchini Muffins


2 pounds of (any) sausage
3 cup zucchini, grated
3 large egg
1 medium/large onion, chopped
1 1/2 cup reduced sharp cheddar cheese, grated
1 1/2 cup seasoned breadcrumbs
2  teaspoon garlic powder
salt & pepper to taste
cooking spray

******Note at bottom*******

Preheat oven to 400 degrees. Spray mini muffin tin with cooking spray.
Cook Sausage, let cool.. Grate zucchini on medium side of grater. In a medium bowl, combine all of the ingredients and season with salt & pepper to taste.

Fill each muffin section to the top, pushing down on the filling with your spoon so it's nice and compacted so they don't fall apart when you take them out of the tin.

Bake for 18 to 20 minutes or until the tops are golden. Remove by inserting knife around edges after they are cooled some, about 10 minutes.


****** Because you can make these with different types of sausage, they can be served at different times of the day. If you make the recipe with breakfast sausage, I do suggest, you can eat/serve them for breakfast. If you want to make these for appetizer's or as an hors d'oeuvres, use a mini muffin pan and reduce cooking times by a third or a little more. In any case be sure to make plenty and be on guard because once your family realizes and has what your making, they'll never be safe again when cooling, trust me. ******  

Wednesday, August 14, 2013

The False Idea on Freezer Food, The Food Storage Basic's Part 1

People love to get great deals on food that comes on sale, fruits, vegetables and meat alike. It is almost a no brainer when it comes to food cost and sales.

Long ago the process to keep food was less healthy and affordable than today. From Vinegar, Oils, Dehydrating, Smoking and Salt Curing, these methods were used and passed down for hundreds of years. Today, in places you might visit, cured meats and sausage hang. When you walk into these places two things happen, your repelled or your mouth begins to water.

While in Italy, I walked into a meat store while passing through a small town. Off the beaten path, I knew I was in a place that not very many visitors came by and it was a place of locals only. The pungent smells hit me first, it was kinda different, then I started to smell the layers of different smoked and cured meats.

Dust laid on some of the meats as if they were just left there, unsellable for what ever reason. My education told me they were longer term curing meats and might be ready now for the harvest. The woman, having a brown stained dress on, a thick cotton, came up and started to greet me. I said hello and passed by her to look and ask her about some Pepperoni I spotted.

She made her way back to the counter where a drawer was, she pushed it in and walked to a cabinet and opened it to reveal walls of hanging cured meats. Some had been sliced on a few times, some new, some whole. I even spotted some cheese and fish.

The reason I tell you this story is so that you understand that meats can be stored and cured, even today it is still used. However, it has to be done right.

For now I want to cover a few basic things, long term and short term food storage for the average person or some one who is just starting out at food storage. The one book I found useful in understanding long term or alternative preserving is this book.


Preserving Food without Freezing or Canning: Traditional Techniques Using Salt, Oil, Sugar, Alcohol, Vinegar, Drying, Cold Storage, and Lactic Fermentation


Second, I want to get your ear on something that is misleading and although generally not a common case, but is for preppers, homesteaders, gardeners and folks who just want to plan cheaper meals it is a great concern. Salt cured meat and freezing.

After reading a article in Meats published by Hobby, it was brought out that meats like sausage, bacon and other salted meats will go rancid and decay after awhile. Before this article, it never occurred to me that  meat would go bad, even if vac packed and handled properly. The Author of the article went on to explain, and then all sorts of light bulbs started going off.... 

As I read, it dawned on me, about the funny taste my own sausage had after 7 months in the freezer. I had not eaten much of it, the tainted meat, but enough to know it wasn't right so I stopped eating it. Then I started to ponder the salt content and how that would stop the meat from freezing solid, like a rock or really hard. I went down and grabbed a slab of my own bacon from the freezer, not that bacon sits very long around here. But I did a flex test on a package. I had preserved it correctly, I was confident in my workmanship and knowledge of processing the bacon. 

So I let a few packages of that old sausage in the freezer and tested it several ways including cooking it and smelling it against the same recipe but fresher, 3 months fresher. I also did a package push test on the meat, while still vac packed. I found that the sausage that was older, the outside of the meat, although just a thin layer, pushed around easier than the fresh sausage which didn't have a layer to push around. 

I cover this issue more in depth in one of my Food Storage Workshops on-line. I mention this today because so many people are starting to buy bulk and perhaps not think of this or not rotating their freezer stock often enough. 

Be sure to check out Part 2 in this mini series, The Food Storage Basic's. I will be covering Dehydrating methods, processes and debunking some of those myths and wives tales. You will learn long term and short term approaches. I will toss in a few good long term recipes to boot...
 

Thursday, January 3, 2013

The Wild Boar Hunt..... Taking Some To Share

There have been a handful of people in my life that, with time and life, have slipped away from. Chris was one of those people that has and I regret this, but such is life..

Chris and I have done a lot of big things together, big game fishing, Elk, Boar, Deer hunting. Although he is a better salt water fishermen than me, I can slay 2-3 large mouth bass to his one. One year we made it to AAA fishing circuit and had two sponsors. 

We got up early in the morning, back then we had pagers, and he had paged me ready to go and head to our final destination.. South Carolina

We had taken some personal time off work, we worked at the same company, and we were known to hangout outside of work...

He had told me of a spot down there where his cousin had hunted a year before, and at the time it was a $800 Boar hunt and we paid for lodging and meals. We were promised each a hog to bring home... I packed the video camera and off we went...

I was so excited, and we were talking about the "what if's" as young men do... Adding a lot of dreams in it and it created some very interesting conversations... We got there and we needed to attend a short two hour class to understand about hunting Boar and working with dogs... Next day we go on the hunt....

Drawing straws, he got to hunt first and kill the first hog while I filmed it.... Within 15 minutes the dogs had a hog chased under a downed tree... The guide told Chris he could jump on top to scare the hog out, and made him aware of our locations and shoot only when he was sure.. So he climbs up does a couple of bounces on the trunk, and out came the hog..

To me, filming it, it was like I was watching it and not thinking about that thing headed my direction... But so it came, and it was so fast, by the time I realized what was going on, the Boar plowed right into me and knocked my on my arse... Camera went rolling and all.... I jumped up knowing that the day before Boars have been known to charge at people... I got up, scared, grabbed the camera to keep filming... Chris didn't kill that hog, but he spent years telling the story on how I got attacked by a Wild Boar....

We both did, in the end get hog meat to bring home.... 


Saturday, September 29, 2012

The Meal, Pioneering With Children....

As a child, we as a family would go camping and fishing along the river banks of many rivers in two states. As we traveled or stayed at camp, we had sandwiches during the day but we always had breakfast and dinner on a open fire cooked in cast iron pots and pans. Often these meals were one dish meals..

Sometimes during the day we had to gather firewood for the fire that needed to last through the night. We tried to always keep a clean camp, but you know how that goes. I remember sometimes rubbing dish soap on the bottoms of some aluminum pans before Mom would cook on them over the fire. But 90% of the time she cooked on cast iron. Fried taters were almost a staple for us as were many non meat meals.

We did have a cooler to cart stuff around and they would go to the store when needed to get stuff. I had many Dutch oven meals, chili and corn bread, stew and biscuits, pot pie, shepherds pie, cobblers the list goes on. Having a fireplace or a place in your backyard to build a fire, you can create a simple one dish pioneering meal with your children or even a relaxing date and change it up a little. But allowing your children or grandchildren to help out will create wonderful memories that they will carry with them all of their lives. After dinner, roast some marsh mellows or try my fav, roasted pineapple over an open fire....

 So the next time power goes out, even if comes back on. Don't travel to the next town over, have a fun time cooking on a fire with your family or friends.

Saturday, September 22, 2012

Dutch Oven Cooking... Bread Making

As I walk down my path in life, I find myself coming in contact with some real wonderful people. Some people like Stan, who does a lot of teaching others, has a passion for his work. He isn't in it for the money because he often volunteers his time for free. He doesn't lug around a case full of trinkets to sell or a selection of fancy cook books...

Instead, Stan carry's a couple of wooden boxes filled with a few pamphlets of bread recipes and tools to work his magical dutch ovens. A man that has walk down some rough roads in time, and has a humble attitude and is generally kind to every one. He enjoys speaking and answering questions and he really sets the tone for the class.

You can tell he is use to dealing with all different people from all walks of life... His steady teaching and answers really show off his teaching skills as every one stays focused on what he is sharing. Over the last two weekends I have spent time with him as a student. Even though I sometimes know what the task is and have mastered the task, it is always good to learn new skills from some one that has been doing it for 62 years like Stan has.

Stan is a regular volunteer at the Old Stone House in Slippy Rock PA  where he also dresses and performs time period dinners that include the correct period of dishes, cups, clothes, manners and food. When you stop by and visit there (a awesome historical place to visit with time period decor and people to explain everything) let him know you read about his awesome cooking skills here.

Here Stan is explaining the basics of no knead bread, the type of bread that we cooked in the dutch oven. As he explains, he shows samples that he made that students will start working with.


While Stan answers questions, he over watches his students repeat the technique of forming the bread to get ready to place on parchment paper.


Now that the bread doughs are formed, they sit waiting for the dutch ovens to warm up and get ready.


Adding the coals over and under the dutch of, and there are some rules as to how many coals to keep the dutch oven up to what temperature. But the hottest coals always go under the dutch oven when bread making. 


Some really hot coals that we started about a half an hour earlier in this quality chimney. Using a quality name brand charcoal ensures a more even burn when baking bread in a Dutch Oven. 


Using handles made made when cutting out the parchment paper, makes placing the bread dough into the 425 degree dutch oven quicl and simple.


As the bread cooks in the dutch ovens, Stan takes the time to explain the charcoal heating process and different times and approaches to baking it.


A QUICK PEEK, and I mean quick to see it baking, and hurry uo and place the lid back on the dutch oven so all the heat won't escape.


Now, it is ready to be removed from the oven as it shows browning, the smell is wonderful. Stan says if it smells like it isn't cooking, it isn't. If it smells like it is burning, it is burning. If it smells like it is cooking, it is.


How pretty is that!!! Perfection using primitive methods just shows you how luck we have it these days, but also how easy it really is. This loaf of white bread is hot and ready for butter and honey.


We also made this wheat bread, and I gotta tell ya, awesome.I do believe that Stan mention where he got these recipes, and I will share those with you later. He also said has made the Honey Wheat Bread recipe that Lewis and Clark used during their exploration


It was great and well worth the time to sit back and listen, I even learned a few things that I didn't know. I was in good company with like minded folks, and one couple that visited really found it a full on learning class. It was great watching them get excited and being amazed by a wonderful end product, by such a simple means..

I know that Stan took his 62 years of skill, trimmed off the fat and just taught us what is right. His cooking skills shined through the final end product. Every one left there more educated and amazed by his skills... 

Friday, September 14, 2012

The Birth Of The Smoothie

There are a few dishes that sit on my table today as did when I was a child. It is sometimes wonderful how we relate food today and the memories from our childhood, sometimes it isn't.

Traci, my sister can correct me on this one, however I am sure it was in October of 1978. We lived in a shanty in a small town in Clarksburg Pa. It was once a sturdy home, left to time and rented without up keep. The coal door still opened as we would feed the coal furnace from the basement and the coal truck put coal through that door. I doubt that at any time in life of that house was it ever warm during the winter.

I had returned from shoveling coal into the furnace as I was told to do, steam in the air, windows covered in condensation, the old brown TV with a fuzzy picture of the evening news was on. Traci and I often peeled potatoes as well as help Mom prep dinner as she had a full time job.

Dinner time in our house was that, all the family come together, sit, ask for people to pass around stuff. It was a Friday evening and Bobby's two children spent that weekend with us. So with 4 children, when Mom shouted dinner, the whole house seemed to rumble and shake as we made our way to our seats at the table. But this night it was a quiet "drag" to the table.

It isn't my fault if your having your own flashbacks by this time, perhaps, but let me tell you more.

Bobby and Mom thought a good meal was a meal where you would have to eat stuff that children think is gross. It doesn't matter how it was cooked, it was just nasty. Bobby's pick that Friday's meal, saute' liver and onions... with mashed taters...

I tried for an hour to climb my way through this meal, it was nothing smaller than Mt Everest, and almost no place to drive my fork in. It was cold and harsh, but Mom just kept pushing forward... Your not leaving that table till your plate is clean.. I remember listening to the clock tick as if minutes were hours...

As  time past, I was alone in the kitchen while every one else fought for a spot to watch TV. Mom went in and put her night gown on... I knew better to waste the food, that is the real reason I didn't try to out smart my way through it. I wasn't a very clever child either and knew I faced a spanking or worse if I did get caught. Then, with a sad face as I looked at her, she said right....

Mom was a War baby and was raised by her Mom and a nanny as the story was told to me. So she had some of that hard liner and dry humor about her that had been caste into her as a young child by a Brit Nanny.

The blender was pulled out, she grabbed my plate, scrapped it into the blender, she came back and grabbed my golden Tupperware plastic glass which was filled with whole milk. In it went like she was a master chef creating a master piece... The blender bogged a few times at the start... than it ran...

She filled that same glass up, placed it before me and ordered me to drink it. I did so in total fear that she was about to become a monster.. Than she filled it up again until the blender was empty, again she ordered me to drink it, but this time my gag reflexes were about to explode. I lifted it up slowly, and couldn't get that liver infused milk drink taste out of my mind. I was crying and begging my way out of it, but I was stuck...

So the birth of liver and onions smoothie was born... The taste test didn't do so well, so it never became a popular fade diet or smoothie...

PS Please look at the labels I have attached to this post....


Friday, September 7, 2012

How To Make Your Own Breakfast Sausage W/ Recipe

Memories of smelling bacon from downstairs always woke me up and made my tummy growl. At home on the farm, it was a frosting designed window as I looked out the window at the sun rising. At Grandpa's it was a cool morning in Hornsby Hollow, and the sun was up and the chickens were calling out to be let out. Isn't it funny how we can recall memories from smells?

Well, I am creating new smells for my children, and from my own recipes, local meat, and organic seasonings, so which I will add were grown right here on my homestead. Seasonings are troublesome for me as I can grow a lot, but some I can not and I rely on other suppliers, so I do the best I can to research my sources.

So lets talk about breakfast Sausage, why? Because I want to do something different and there is a very limited selection out there, and the ones that are out there that are links, some of them are so processed they aren't even sausages....

Ѽ  How about a couple things found right on the Homestead? How about some Maple and Apple Breakfast Sausage links?

4 lbs of lean pork
1 1/4 pork fat
6 tsp. garlic powder
2 cloves fresh garlic
3 tsp. crushed Sage
3tsp black pepper
1 tsp of celery seed
2 tsp of smoked paprika
1 tsp marjoram
2 tbsp of dried parsley
1/2 apple sauce
1/3 cup apple juice
1/4 cup maple syrup
3 tbsp of lemon juice
 34-36 mm casings  ( I like New Zealand Lamb casings)

Cut and grind meat and pork fat to a fine texture together..

In another bowl, blend spices add apple sauce/juice and lemon, mix well. Add bowl ingredients and meat and mix at room temperature until well mixed. Put it in the fridge and let it set 12 hours.

Soak your casings and rinse them several times...

Stuff the meat into casings to 5 or 6 inch long links, or make into patties.... Freeze or use within a couple days.


Monday, August 27, 2012

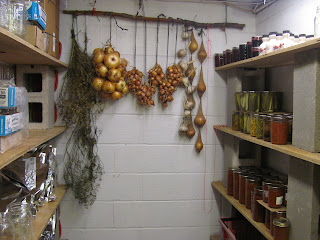
Stocking Up The Pantry 2012...

As the garden keeps giving, I keep on putting food up. Because I use several methods of storing food, I use the methods that best suit our needs and I know the food will get used.

While the pantry fills, taters sit at the bottom under every shelf, jars start to stack up, and I end up putting empty jars waiting to be filled every where I can.

To the right are Jars filled with good eats, as well as the left side. The right is wet side, the left is the dry side. We are looking good so far and ahead of production this year. I am short on taters, and I was late on beans which are now canned from mine and Marks garden. I still have Lima, Kidney, Pinto and Mexican Red Beans that are almost ready to harvest. Because they are dried beans, they need time to ripen and store.

I also have 19 Butternut Squash that are bigger than a pound each, and a few Pumpkins. The Okra is still going as well as the Sunflowers. I still have 2 bushels of maters and the peppers will continue to grow. 

The pantry is looking good...


Tuesday, August 14, 2012

Ѽ Modern Pioneer's Original Apple Chip Recipe Ѽ

 With all the recent request for my Wonderful recipe, I decided to blog it..

Modern Pioneers   Ѽ Ѽ Apple Chips Ѽ Ѽ
1/3 cup Cinnamon
1 cup cane sugar
nice pinch of Allspice (heavier pinch if you want the taste to lean towards Apple Pie)
Pineapple juice
7 pounds of choice apples (use sour apples for sweet/s
our chips)

I use two thicknesses, just over 1/8 for crunching chips, 3/16 for less crunchy. Cut Apples into desired width, placing the fresh slices into the pineapple juice until you fill the bowl. No need to soak them as they just need to be coated with the juice. the juice has vitamin C which will protect the color.

Mix the Cinnamon, sugar and allspice together blend well. Sprinkle over apple chips already placed on trays. Then dehydrate until crispy ( ⌚ 8-14 hours)

If you want to omit the sugar altogether you can do that but the flavor will be much stronger, and I agree healthier as well. You can do this in a oven, but I am not sure how that would work.


If you want to make some really different fun chips, consider getting a spiral slicer like this one. Great for other dishes as well.

Wednesday, August 8, 2012

Canning Those Tomatoes/Sauces and Better Sauce Ideas

While waiting for the bumper crops to start, those tomatoes start to come in. I love to eat the wonderful fruits as they come in the house, having that kind of reward is so wonderful. I have, through the years come up with many uses as has Danielle. Coming from England she brings with her a different pallet as well as fresh eating ideas.

Along with those big round bundle of joys comes the start of the Paste Tomato harvest, Roma's. I plant Heirloom Roma's which don't grow as big as the ones at the store, but are packed with 2x more flavor and meaty goodness. As the war against GMO's continues, I couldn't tell you the differences of nutritional values between the two because I plant Heirloom seeds.

A few years ago I bought a few Roma's at my local GMO peddler store. I cut mine open and compared them side by side. Mine didn't have such an even color, nor was its shape perfect. Mine was smaller and didn't weigh as much and wasn't as plump. When I cut them open I could see right away mine was more compacted and wasn't as juicy. But the color inside was as rich as the outside color, the GMO fruit was whiter and had more runny juice inside. It had a much better shape and even blotted color.

When thinking about a sauce tomato, consider water content and pulp content as these are important qualities when making good sauces. Starting out with a good quality Heirloom Roma is the first step in making a good sauce.

Once the Roma's start to come in, just before the bumper crop, for a few weeks you will start to harvest a few pounds a week. The rate at which they start to come in increases every couple of days. This period last a couple weeks in my zone, and so I have to prepare and process those early Roma's.

Often I will process the first ten/fifteen pounds and freeze the pulpy juice and when the bumper crops hit, and I am in full processing swing, I will thaw that stuff out and mix it with my fresh tomato sauce. However, in both cases I allow my homemade puree to sit in a stainless steel bowl, covered in the fridge, overnight.

If your making your own stuff, homesteading or just being frugal, time and money is the two things we want to reduce. This can also help make us a better product. By letting the homemade puree sit overnight, the water content of the juice rises to the top, allowing us to skim it off so that it isn't stirred back into our sauce, reducing energy and cooking time to make a quality, thick sauce.

Even after canning, compare my approach to your traditional sauce by setting the two jars side by side on a shelf for a few days. You will see how much less water content my method has. Also your sauce will be thicker, richer and you will use 30% less energy making the same amount of product.

Although I adjust the Spaghetti recipe a little, I use the one found in Ball's Blue Book.


Sunday, August 5, 2012

POOW__TAT__TOE Dehydrating


This food has long been the staple in many parts of world, and I believe has saved lives as much as ended lives. Stupid people are still building and shooting each other with potato guns. Then there was Black 47 in Ireland, again the source of people dieing and starving because crops were wiped out.

One of those frequent questions I am asked about is how to do potato in a dehydrator?

Lets talk about uses, and the first would be to make your own Scalloped Potato oven dish... Then there are skillet potato's, trail potato dishes, and they are light and store really well. They are really affordable and come in big ole bags that you can just dehydrate for a week and turn a 100 pound bag into 25 pounds of goodness.

The process is simple to address, but I suggest having a food slicer as you will be able to get lots done in a short amount of time. If all you have is a mandolin slicer, use it.... I clean them well and leave the skins on for nutritional reasons.

Get a bowl of salted water beside your work station, fill a vessel or sink with cold water add ice, put a pot large enough to dump your potatoes in on the stove on high, salt it as well.

Slice your potatoes just about 3/16 of an inch thick and place them in the salted water at your work station. As you slice the potatoes, place them into that bowl making sure enough water to cover them. Once you have finished them take them to the stove and put into your boiling water. Watch the water as it heats back up. Once it returns to a small boil, boil for 6 minutes, stirring gently and often to separate the pieces, drain and place into cold water right away. Rinse then one last time and rack them into your dehydrator and dry them until hard.....

Pictured here on the right as they are temporary place in a zip storage bag next to a box bought big manufacturers product, which looks starch white and unnatural to me. A few years ago I bought a box sample from Harmony House Foods, which is one of the largest dehydrating companies in the world, and mine looked just as theirs did. So don't get all worked up over the less white look of your potatoes, unless they look nothing like mine.   
Barry Farm does sell a dehydrated cheese that you can buy pretty cheap and make up your own recipe or use mine. Either way, this will be a rewarding dehydrating project/food store.


Monday, March 5, 2012

How To Grow Onions

Onions are one of the most popular vegetables for growing in home gardens and are one of the first crops of spring. They can be stored over winter thus making a versatile crop They are used in a huge range of culinary dishes,both raw and cooked.

If adding manure or composted organic matter then add a few weeks before sowing / planting out.
Onions can be planted from seed or from sets (small partly grown onion bulbs). Sets are more expensive but they tend to be more reliable in their results and also require less work - no thinning and reduced onion fly risk.

If sowing from seed then sow in holes about 1/2 inch deep with about 5 inches between seeds. If sowing in rows then space the rows about 10 inches apart.

The soil should be moist before sowing so check the soil the day before sowing and water if the soil is dry.

If planting onion sets then they can be planted around Mid to Late March. Again space rows about 10 inches apart. Sow sets around 5 inches apart as they shouldn't require any thinning. Dig a small hole for each set and place the set in neck upwards. When covered back up with soil the tip of the neck should just show through the soil surface.

Spring onions (scallion) can be sown from April and planting should be staggered every few weeks to ensure a continuous crop throughout the growing season. Onions will grow in most climates and are frost resistant.

Onions will grow in almost any soil from sandy loams to heavy clay. The soil should be firm. If your soil is heavy then you can introduce some organic compost or manure into the soil to help its moisture retaining properties. Onions prefer a slightly acidic soil - PH 5.5-6.5 is a good PH for growing onions.

Frequently weed between the onions by shallow hoeing, onions do not trap much incoming light due to their sparse leaf forms so weeds can take full advantage of the available light.

Onions are ready to harvest a week after their tops have started to fall over and are yellowed. Use a small shovel to lift the onions out of the ground. Take care not to damage the skins as this invites decay organisms in to attack the onion flesh.

Onions should be harvested on a sunny day, cleaned of any soil still attached to them and then placed on top of the soil where they will dry out with the help of the sun and wind.. Leave the onions out for a few days,until the tops dry out.

Remove the tops with a sharp knife about 2 inches above the onion top so that decay organisms do not have direct access to the onion bulb.

Discard/use any onions that show signs of decay or damage as these can affect healthy onions if they are stored .

If you want to store the onions over winter then you can cure them by hanging them in a well aired place (such as from the roof of a summer house veranda). Mesh bags or strings can be used to group and hang the onions and they should hang for about 3-4 weeks.

Saturday, December 17, 2011

Getting Ready For The Deer Hunt After The Holidays, More meat!

To my disappointment this year, I have been to busy to go hunting outside a couple hours the first day. I have hired seasonal help, but the hunting season escaped me. I have plenty of local beef, pork and chicken, but I have to get these $35 dollars worth of dog tags filled. I love black powder hunting, it fills my "Jeremiah Johnston" side and gives me that good ole feeling of living off the land.

There is a male squirrel who is going to be in my fry pan before to long. He has been clawing on my mushroom logs at the top. He will be deep fried and ate with some greens.

Sugar season is coming up soon, about 8-12 weeks from now. Working on my rain barrel system next month and looking forward to sap gathering this year all on my own. Joshua is looking forward to it as much as I am, a great time spending time together creating memories of living off the land. If there is one seed I am sure I planted with my son on living off the land, it is maple syrup making. 

Sunday, November 13, 2011

From Downspout To Sap Out, Interesting Useful Idea

While winterizing this year, confident in my acquired skills of maple syrup making, spotting and marking of maple trees on my own property (more than four I have tapped in the past). Thinking of my resources on hand to start building my sugaring supplies, not wanting to spend more money, I decided to take one of my rain barrels and keep it out of storage for sap gathering. I will need to buy one large barrel to put in the shanty for holding sap while cooking it down. But I decided to spread the idea so that you can take advantage of my newly thought of idea.


In truth, maple syrup making is a skill handed to me by my grandfather. So as you might know, I planned to be at this point a year ago, but the murder of my parents put my life on hold. My feelings of their deaths has been a roller coaster at times, and time does allow us to learn to except the way things are. I still get angry and upset at times, if I didn't I wouldn't be human. I miss them and wished they could share life with us. Being as it is, perhaps they were saved and are watching us from heaven.

Realize that putting a hold on my path of being self sufficient has not taken hold of my ideas and made me put it down and surrender my diet and lifestyle to big corporation. Learning the skills needed by pioneers of the past days keeps me excited and the rewards of my hard work keeps me going. I will have a plan to share with you for what/where I want to be in the next year. I know that I want to expand my diet to include more dried beans.

I am in a better mental state and find myself getting back to normal something to look forward to. I miss my folks but I know although they are gone, they would want me to keep moving forward in my own life.

Hope you hang in there with me while I get things back together in my own life. Peace be with you, and spread some love. Life is too short to hate. Jason

Wednesday, August 17, 2011

Wasting Some Green, and Seeing Red, A No Waste Trick

Well the garden is coming in and doing its job, I have processed pickles, chutneys, jams, squash, onions, garlic and the corn is coming in.

I have had so many cukes, I put some in the frig and meaning to get back to them for bread and butter pickles, and well they went limp on me. I try to have a no waste rule, however I have been so busy with the new building project, time just slips by. I picked another bunch today and threw out the old shriveled ones.

So the first small handful of red maters were nice, then today I harvested 6 pounds or so. I processed them for juice using my kitchen aid and two different attachments combined together to pulp free my sauce in less then 15 minutes I had over a 1/2 gallon of the good stuff. I have frozen that and will add that later when I have enough organic juice to make a few batches of sauces and salsa.

The trick to get every little bit from the maters using my method, is to process the maters 4 times through the kitchen aid. I ended up with 1/4 cup of seeds and just skins. The old method use to take me hours, and there is nothing wrong with doing it by hand. However, I am a modern pioneer and I love to save time processing as long as I get a better or higher quality end product. In this case, it was hours sooner and I got 100% of usable product.

If you want me to share what products I use, and my method, let me know. I am always happy to share.

Saturday, August 6, 2011

Dehydrating, Dealing W/ Bumper Crops, Secret Tip, The Recipe

This time of year most folks love to share the fruits of their labor with others. So many people bring in food from their gardens and give it to co-workers and such.

NOT ME!! If you now suspect that I am just a grumpy old man, that isn't true. However, I do like to share some of my food with others and love to fellowship and share with certain folks. I process all my own food, and I deal with my bumper crops differently than most people.

Some people do get what I am doing, and I gave a friend some Jam, only to find out they didn't use it because it was home processed. I know right? But it was the first time, and the last I shared my food with them.

This time of year, its Cukes and Squash... I know that mater time is just around the corner when bumper crops of these two veggies head for the dehydrator. Cukes have tons of canning ideas, my focus in this article is Squash.

Zuke and Yellow are two of the most produced squashes in gardens. People love to grow them with little to no care, plant the seeds and off they go. I find that most people give away squash and maters, and from time to time Okra. NOT ME!!!


You know by now I love to process and store my own food, and you want to learn from my adventures and share your own ideas. To prep my squash, I clean it, cut the ends, and set my slicer for 5/16 of an inch. Now it is not wise to dehydrate big squash without a little bit of work, but armed with an egg cup, you will now be able to store and keep more food than you ever knew.


Yes, for this article I am going to use the word pith, it is the only word I know that I can described the center of a squash that has mature seeds in it. Now, having seeds in dehydrated food isn't a crime. The criminal here is mature seeds. Seeds are self contained units, and if activated, will ruin mass amounts of food stores. Now if your storing them for seeds that is different, as the end use is much different.

 Allowing mature seeds to be left in can not only ruin food, but also contain natural chemicals that will off set the flavor of your food. So armed with a egg cup, I remove the pith and mature seeds so that I can continue to save the squash for dehydration.I put up 23 pounds of squash in one go using my Excalibur 3900.

Some will say this recipe has been in many families recipe book for generations, as for a modern pioneer, our methods of food storing do change when a new way allows for better food storing. With that, food recipes and the desire to make our own comfort food makes us change our recipes to adapt to our new ways.

I am positive some of you growing up on a farm have spent many summer nights at the table with a bowl of squash mess. I know this time of year it was a near staple fixed on the grill in a cast iron pan over hardwood fire. We never cooked inside unless it was early morning in the summer. So I gave my hand at making this recipe with dehydrated food. After trial and error, I have developed the recipe and process.

11/2 cups each of dehydrated yellow and zuke squash
1/4 cup dehydrated onions
dehydrated garlic to taste
2 1/2 cups of veggie stock or chicken
2 tablespoons of butter
3 tablespoons of flour
salt/pepper to taste

Put stock in fry pan, add squash, simmer for 20 minutes over medium heat. Increase temp to high, cook off remainder of stock liquid, turn back to medium, add butter, when squash begins to turn brown add butter, when butter melts add flour and return to high heat until the flour is brown.

I tested this recipe throughout the winter making as many as 8 to 12 side dishes. From the first to the last, outstanding!!

Monday, May 2, 2011

How To Make And Grow Your Own Mushroom Logs, More Self Sufficient Ideas

I know many of you have been waiting for me to complete this video this spring. So it is now completed, and I also want to share a good reliable source for you to purchase your spores from.

This self sufficient task was so easy to do and gives years of rewards. If your in need of getting your hands on some white oak logs, be sure to ask your friends that own land, or find a saw mill near by. A logging company would be happy to sell you or give you some branches from a white oak tree they have harvested for wood. People really get interested when you start to explain to them what your doing with the logs.

Remember to place the log in a shaded area, where there isn't a lot of wind. If you need to build a wind break, do so. Also remember to place your logs just above the ground on some other logs or an old pallet.

If you start this spring, you will get a few in the fall, but expect full production to start next spring.

If you don't have the means to get your hands on the wood, but you want to try it out on the cheap. Try purchasing one of these, for the cost of this single purchase, it will pay for itself the first time it grows Mushrooms for you. Just follow the simple instructions included and you will be little more self sufficient. Its a real fun project to share with others..

Saturday, April 23, 2011

FREE BOOK, FREE GARDENING BOOK, YOURS FREE!!!! How to Get It?

Here is a link to a free gardening book to add to your electronic library, but finish reading my post before you run off to get it, here is how to get it, at home or on the go. RX from the Garden.

FREE BOOK

When you click on the link, look for the button that says buy with on click, its free so it will lead you to another page, look for your device, click the device that you own, and down load the book for free.
 
How is that for a good deal? Enjoy my friends!!!!

With respect to our mother earth, I cleaned up some of mans mess that we put in a stream near by. Although it rained, it only took me 3 hours to remove the tires, debris, and trash. I took it to the dump, and they took it for free. All I did is mentioned I was cleaning up for earthday, and they took the trash in for free.