Showing posts with label food. Show all posts

Wednesday, October 23, 2013

Hardtack, The Recipe and Practical Uses

As I walk you through making Hardtack, I wanted to show some pictures of the process but I want to tell you a little bit more about this staple.

Hardtack has been made and used for centuries by many types of people including Sailors, Pioneers and Travelers. It is a type of cracker, that when made properly, can be stored and last forever. On its own, it can be eaten once softened. It was often dipped and used in broths, soups, stews, beans and coffee.

HT can be carried as long as it stays dry, it can be useful. It stores really well in air tight containers and in the dark. You can use basic flour, wheat flour and for this small batch, I ground my own Wheat. You only need water and salt from here. As you can see, I made a small batch, but I suggest that you double up the recipe and make double using the same amount of energy.

Mixing 3 cups of flour, you can mix 2 cups of white and one cup of Whole Wheat, all white flour, all wheat flour, whatever suits your needs. Adding 1 cup of water or so to make a tight dough, and 3 teaspoons of salt. Here I kneaded the mix and formed a ball.

I rolled the now formed dough out after kneading it to form together.

I grew and ground my own flour as you see here. I rolled it into 1/2 thick piece.

I trimed the edges, set them aside to for and make more and began to cut them into 3 inch squares

After cutting them, as you can see they don't have to be perfect at all. Using a small skewer, I poked a bunch of small holes in them, but not all the way through.

I separated them and placed them on a cookie sheet to bake at 350 degrees for a half hour, flipped them over and continued to bake them for 30 minutes more. The general rule to tell if they are done is that they should not be soft at all, hard as a rock they should be.

Here is the final product!!!

3 cups of flour
1 cup of water
3 teaspoons of salt

Bake at 350 for 30 minutes one side, flip and continue for 30 minutes until hard. 


Thursday, August 15, 2013

My Popular Sausage Zucchini Muffin Recipe

I have been asked for some of my Zucchini recipes and what to do with this popular summer Squash. If your at work and people want to give it away, you will find most people will take a few at first, then nobody wants any more. However you can do more with it than most people know, I mean I like to get out my seasoned cast iron fry pan and mix it with Yellow Squash and Onions.

Dehydrating it is great, and I will add this same recipe made with dehydrated Zucchini Squash later. My goal is to show you what to do with it while it is fresh and everywhere you turn. If one will grow, you will get others until the plant dies. Or other people will get sick and tired of them, along with some people who grow them for fun, will just give them away....

Now I am not known for top rated cooking, okay I am a awesome trail cook and a self proclaimed Gravy Master, but there are some recipes I have gotten or I create on my own. This one was modified from a souffles recipe I made up, but it was better as a muffin. I had too many eggs on hand and was being creative and stumbled upon this idea/recipe.

From Boy Scout meetings to Swim meets, these became a family favorite very quickly. Then during parties these just disappeared and rave reviews were heard many times. If your looking to get married, remember the way to a mans heart is through his stomach. LOL... Enjoy... Jason


Sausage Zucchini Muffins


2 pounds of (any) sausage
3 cup zucchini, grated
3 large egg
1 medium/large onion, chopped
1 1/2 cup reduced sharp cheddar cheese, grated
1 1/2 cup seasoned breadcrumbs
2  teaspoon garlic powder
salt & pepper to taste
cooking spray

******Note at bottom*******

Preheat oven to 400 degrees. Spray mini muffin tin with cooking spray.
Cook Sausage, let cool.. Grate zucchini on medium side of grater. In a medium bowl, combine all of the ingredients and season with salt & pepper to taste.

Fill each muffin section to the top, pushing down on the filling with your spoon so it's nice and compacted so they don't fall apart when you take them out of the tin.

Bake for 18 to 20 minutes or until the tops are golden. Remove by inserting knife around edges after they are cooled some, about 10 minutes.


****** Because you can make these with different types of sausage, they can be served at different times of the day. If you make the recipe with breakfast sausage, I do suggest, you can eat/serve them for breakfast. If you want to make these for appetizer's or as an hors d'oeuvres, use a mini muffin pan and reduce cooking times by a third or a little more. In any case be sure to make plenty and be on guard because once your family realizes and has what your making, they'll never be safe again when cooling, trust me. ******  

Tuesday, August 13, 2013

Zucchini Bread Recipe


Zucchini Bread Recipe

2 Eggs
3 cups grated Zucchini
1.5 cups of Oil
3 cups of Sugar
4 cups of Flour
1 cup of Raisins 
1.5 teaspoons Baking Powder
1 teaspoon of Baking Soda
1.5 teaspoon of Nutmeg plus a pinch
1.5 teaspoon of powdered Ginger plus a pinch
1 teaspoon of salt
2 teaspoons of Cinnamon
1 Tablespoon of Molasses

Optional 1 Cup of chopped nuts (suggested)

Grate the Zucchini allowing it to drain in a strainer for only 5 minutes then place into bowl. You will need the extra moisture later on, so dump the Squash in the mixing bowl.

Mix Eggs, Zucchini and oil well. Sift Sugar, Flour, Baking Power and Soda, Nutmeg, Ginger, Cinnamon and add to liquid then add Molasses and Raisins. Then add optional nuts and mix well.

Grease and flour two loaf pans, split dough into two pans, bake at 350 degrees for 1 1/4 hours or 75 minutes. Allow to cool on bread rack or two wooden spoons. Remove serve warm or at room temperature with Butter or Cream Cheese.

Sunday, November 25, 2012

Cyber Monday, Tree Standing, I Need Your Help!!

I hope you will take sometime out tomorrow and visit our Trading post and make some purchases there for this years Holidays. I have a few plans to use the money including building a website domain, and funding a couple DIY winter time projects. We have yet to do more than $75 in a single month, and opening the store I hope we can start generating some revenue to support more projects and giveaways.

All of the mods are friends of mine and have been working as volunteers as I do also. I depend on the two Company's I own to pay my personal bills, and I am booking for March of next year all ready. So as you now see, I am not looking to make a living from this blogging and teaching. Don't get me wrong if I could make a living at it, that would be wonderful, but that isn't in the plans right now.

It doesn't matter what you buy when you follow my links, you will still be contributing if you follow my links. I really would like more support in order to build the website well, so we can have our very own place. I own the domain already however I have to pay to have it built, and I want to have it built correctly.

I secured the deer stand the other day and also cleaned and bore sighted my weapon. I decided to hunt this year with my Winchester .270 Rifle. With a nice Scope, this is a very dependable weapon that kills with one shot. I got it in 2008 and killed my first doe that year with it.

As always, I will shot and kill the first legal buck I see, and I have done some scouting and located a nice area the deer have been bedding down in. I hope I get my kill in tomorrow...

Saturday, October 20, 2012

Raw Milk Turns Into Many Homestead Products

As I sit here this evening, while the cool fall air swirls around the trees to pull off the dead leaves and floats them to the ground, today was a good productive day.

You might remember the other night I went to a secret location and got some raw, right from the cow, milk. Now before you start posting your thoughts of how bad raw milk is for you, I will not listen to your nonsense. Your wasting your time preaching to me about all the things bad with raw milk, and if I wanted to waste my time I would combat and debate the issue with you. But I am not going to do that.


As I used a method taught to me by my Mom, I had confirmed the technique of separating the cream from the top of the milk. So out of the milk I got I ended up with enough cream to make nearly three pounds of butter. You see I dodged that "how much cream did you get" bullet? I didn't measure my cream as I should have because I forgot to and just moved into butter production first thing this morning.

So, I know your ready to get into the whole butter production, but I wanted to let you know in my useful gadgets I have a Mixer Stand like the one I used to make my own butter. One of these days I am going to blog a list of stuff I make with my Kitchen Aid stand mixer.

So I started out by allowing my cream sit overnight and then just chilled it a couple hours. I added some into the stand mixing bowl, and kept adding until the mixer was going on high and I always make a foil bonnet around it to keep it full.


 So as it starts to churn, it will thicken up and the milk and as you can see in the photo below, the level of milk has dropped compared to the one above. Generally I just keep adding cream until I get enough where I know my machine can handle the butter.


So by adding foil around the edge, tucking it in, I can fill my mixer up pretty full without spreading milk all over the kitchen.


Taking a peek in, can you see the noticeable change it texture and color?


Well it won't be long until my butter starts to clump and balls together. When it is at this point it is time to take it out and strain it.


Now it is time to start cutting the butter, if you don't cut it, it will become rancid very soon and you have wasted all your cream, time and effort. Cutting the butter with a pastry cutter and cold water will clean out all the residue milk that has been collected during butter making process. Ice cold water added, than cut it for a couple minutes, strain add new cold water, and repeat until your butter cuts clean in water. I use 1/2 cup cold water during my first cut and mix that with my buttermilk. The remainder several batches after the first one I toss out.


This is my last cut, clearly from the first photo you can see the water color get much clearer.


Now I will strain the butter one last time and begin to press it into containers for long term storage. Notice the water coming out?


Don't be afraid to poke your fingers down into the butter to remove the air pockets and the water will also continue to come out. Now it is time to smooth it out for long term storage...


Some advice, never share your source for raw milk by bragging about it, share with people you know if the farmer allows it. Make sure to visit your farmer and make sure they are a clean milker. If your lucky as I am, mine doesn't use hormones and mine grazers and produce organic milk for the market.

So tomorrow for breakfast I will have homemade buttermilk (made from my by product from butter production) pancakes with my homemade butter covered in my homemade maple syrup.... I feel pretty proud to say all those homemade words in one sentence....


Friday, September 14, 2012

The Birth Of The Smoothie

There are a few dishes that sit on my table today as did when I was a child. It is sometimes wonderful how we relate food today and the memories from our childhood, sometimes it isn't.

Traci, my sister can correct me on this one, however I am sure it was in October of 1978. We lived in a shanty in a small town in Clarksburg Pa. It was once a sturdy home, left to time and rented without up keep. The coal door still opened as we would feed the coal furnace from the basement and the coal truck put coal through that door. I doubt that at any time in life of that house was it ever warm during the winter.

I had returned from shoveling coal into the furnace as I was told to do, steam in the air, windows covered in condensation, the old brown TV with a fuzzy picture of the evening news was on. Traci and I often peeled potatoes as well as help Mom prep dinner as she had a full time job.

Dinner time in our house was that, all the family come together, sit, ask for people to pass around stuff. It was a Friday evening and Bobby's two children spent that weekend with us. So with 4 children, when Mom shouted dinner, the whole house seemed to rumble and shake as we made our way to our seats at the table. But this night it was a quiet "drag" to the table.

It isn't my fault if your having your own flashbacks by this time, perhaps, but let me tell you more.

Bobby and Mom thought a good meal was a meal where you would have to eat stuff that children think is gross. It doesn't matter how it was cooked, it was just nasty. Bobby's pick that Friday's meal, saute' liver and onions... with mashed taters...

I tried for an hour to climb my way through this meal, it was nothing smaller than Mt Everest, and almost no place to drive my fork in. It was cold and harsh, but Mom just kept pushing forward... Your not leaving that table till your plate is clean.. I remember listening to the clock tick as if minutes were hours...

As  time past, I was alone in the kitchen while every one else fought for a spot to watch TV. Mom went in and put her night gown on... I knew better to waste the food, that is the real reason I didn't try to out smart my way through it. I wasn't a very clever child either and knew I faced a spanking or worse if I did get caught. Then, with a sad face as I looked at her, she said right....

Mom was a War baby and was raised by her Mom and a nanny as the story was told to me. So she had some of that hard liner and dry humor about her that had been caste into her as a young child by a Brit Nanny.

The blender was pulled out, she grabbed my plate, scrapped it into the blender, she came back and grabbed my golden Tupperware plastic glass which was filled with whole milk. In it went like she was a master chef creating a master piece... The blender bogged a few times at the start... than it ran...

She filled that same glass up, placed it before me and ordered me to drink it. I did so in total fear that she was about to become a monster.. Than she filled it up again until the blender was empty, again she ordered me to drink it, but this time my gag reflexes were about to explode. I lifted it up slowly, and couldn't get that liver infused milk drink taste out of my mind. I was crying and begging my way out of it, but I was stuck...

So the birth of liver and onions smoothie was born... The taste test didn't do so well, so it never became a popular fade diet or smoothie...

PS Please look at the labels I have attached to this post....


Friday, September 7, 2012

How To Make Your Own Breakfast Sausage W/ Recipe

Memories of smelling bacon from downstairs always woke me up and made my tummy growl. At home on the farm, it was a frosting designed window as I looked out the window at the sun rising. At Grandpa's it was a cool morning in Hornsby Hollow, and the sun was up and the chickens were calling out to be let out. Isn't it funny how we can recall memories from smells?

Well, I am creating new smells for my children, and from my own recipes, local meat, and organic seasonings, so which I will add were grown right here on my homestead. Seasonings are troublesome for me as I can grow a lot, but some I can not and I rely on other suppliers, so I do the best I can to research my sources.

So lets talk about breakfast Sausage, why? Because I want to do something different and there is a very limited selection out there, and the ones that are out there that are links, some of them are so processed they aren't even sausages....

Ѽ  How about a couple things found right on the Homestead? How about some Maple and Apple Breakfast Sausage links?

4 lbs of lean pork
1 1/4 pork fat
6 tsp. garlic powder
2 cloves fresh garlic
3 tsp. crushed Sage
3tsp black pepper
1 tsp of celery seed
2 tsp of smoked paprika
1 tsp marjoram
2 tbsp of dried parsley
1/2 apple sauce
1/3 cup apple juice
1/4 cup maple syrup
3 tbsp of lemon juice
 34-36 mm casings  ( I like New Zealand Lamb casings)

Cut and grind meat and pork fat to a fine texture together..

In another bowl, blend spices add apple sauce/juice and lemon, mix well. Add bowl ingredients and meat and mix at room temperature until well mixed. Put it in the fridge and let it set 12 hours.

Soak your casings and rinse them several times...

Stuff the meat into casings to 5 or 6 inch long links, or make into patties.... Freeze or use within a couple days.


Wednesday, August 8, 2012

Canning Those Tomatoes/Sauces and Better Sauce Ideas

While waiting for the bumper crops to start, those tomatoes start to come in. I love to eat the wonderful fruits as they come in the house, having that kind of reward is so wonderful. I have, through the years come up with many uses as has Danielle. Coming from England she brings with her a different pallet as well as fresh eating ideas.

Along with those big round bundle of joys comes the start of the Paste Tomato harvest, Roma's. I plant Heirloom Roma's which don't grow as big as the ones at the store, but are packed with 2x more flavor and meaty goodness. As the war against GMO's continues, I couldn't tell you the differences of nutritional values between the two because I plant Heirloom seeds.

A few years ago I bought a few Roma's at my local GMO peddler store. I cut mine open and compared them side by side. Mine didn't have such an even color, nor was its shape perfect. Mine was smaller and didn't weigh as much and wasn't as plump. When I cut them open I could see right away mine was more compacted and wasn't as juicy. But the color inside was as rich as the outside color, the GMO fruit was whiter and had more runny juice inside. It had a much better shape and even blotted color.

When thinking about a sauce tomato, consider water content and pulp content as these are important qualities when making good sauces. Starting out with a good quality Heirloom Roma is the first step in making a good sauce.

Once the Roma's start to come in, just before the bumper crop, for a few weeks you will start to harvest a few pounds a week. The rate at which they start to come in increases every couple of days. This period last a couple weeks in my zone, and so I have to prepare and process those early Roma's.

Often I will process the first ten/fifteen pounds and freeze the pulpy juice and when the bumper crops hit, and I am in full processing swing, I will thaw that stuff out and mix it with my fresh tomato sauce. However, in both cases I allow my homemade puree to sit in a stainless steel bowl, covered in the fridge, overnight.

If your making your own stuff, homesteading or just being frugal, time and money is the two things we want to reduce. This can also help make us a better product. By letting the homemade puree sit overnight, the water content of the juice rises to the top, allowing us to skim it off so that it isn't stirred back into our sauce, reducing energy and cooking time to make a quality, thick sauce.

Even after canning, compare my approach to your traditional sauce by setting the two jars side by side on a shelf for a few days. You will see how much less water content my method has. Also your sauce will be thicker, richer and you will use 30% less energy making the same amount of product.

Although I adjust the Spaghetti recipe a little, I use the one found in Ball's Blue Book.


Wednesday, August 1, 2012

Report: Mushroom Log Project

With the drought in full swing, I have had other worries on my mind other than my mushroom log tower. In the spring as it came in, if that's what you want to call it, I checked my logs after every rain. Time and time again I left thinking maybe soon.

As it sat on my mind from time to time, I became discouraged. I spent about $32 dollars and made a lot of effort to complete this project. I don't like wasting time or energy let alone money out of my self sufficient fund. Mark, would remind me to check my logs after he found some on his... It was a constant reminder that I had failed that project. My research, when I did the project had slipped my mind this past spring or the negative just masked it.

So I went to the farmers market and a man was there with a table full of Shiitake mushrooms, we began to talk and we covered the same conversation Mark and I had the day before. Then I decided to take what I had learned, what Mark and I talked about as well as the man at the Farmers Market and put it into action.

So Saturday, Joshua and I took the logs to the pond, lashed them together, and plunged them into the pond. Sunday, after church, we took them back out after a 24 hour soak. At first they just seemed water logged, so we continued to stack them up and I would return Monday to check them out.

Monday came and I forgot to check on them, so yesterday I went up and checked on them again. Oh, I had hoped that they would show signs of mushrooms growing, but I didn't want to lift my spirits to high so when I was disappointed I wouldn't have far to fall back. Life does that to us from time to time doesn't it?

So as approached the pile I saw something, a small round light brown looking thing... I had a closer look... Well, what do you know it WAS a mushroom. I quickly looked all the logs over... and they were EVERYWHERE!! I was so excited, I started to count them, then I saw two growing from one hole, I thought " hmmm reminds me of a double yolk egg... cool ". A brief few photo's, and off  I went to the house to make an announcement. I did and everyone was like "good for you", Jessica said "gross, I hate mushrooms", Josh walked out to have a look!!!

So here it is Wednesday, and here is a few photo's of my rewards.... But first, I gotta say this.... YES another self sufficient skill done!!! Off the SS BUCKET LIST!!


Thursday, July 26, 2012

How To Process More Tomatoes and Make Seedless/Semi-Seedless Jams

I am ready to still continue making my own food if power is lost for long periods of time. I know how and have the proper equipment to manually prepare my own food for long term storage. But for now, I have power and I have lots of fruits and produce to get through.

Using technology to help you sustain a self sufficient life isn't a bad thing, and because you use it to help you doesn't mean that your not doing it right. Sure, some people might say "well that isn't the way it was done/you can do it a more primitive way" and most of the time their right. But you know what? We are modern pioneers, not pioneers without the tools available to us to use.

Go back 100 years with a chainsaw and ask a Lumberjack yielding misery whip to fall a Redwood in Oregon, if he would like to try your chainsaw. After he uses your chainsaw, you would have to shoot the guy to get it out of his hands. Maybe it is just me or perhaps you think like I do, it is just common sense to use what you can to help you. I got a Kitchenaid stand mixer some years ago, the the fancy high end one. I had picked it up for a few hundred bucks. I started to use it to make bread dough and mix other things when I could.

One day I went into the store going to check out the attachments that I could use to make more use of mine. So there it was, the one thing I needed the most... The Kitchenaid strainer attachment... My mind started racing like the dad did when he opened the box and saw the leg lamp in the movie Christmas Story... It was amazing to see it there, and it drew me in and I didn't care about the cost. I was drawn in by all the uses and how much time it was going to save me... so I bought it...


I got it home and started to make jam the following morning, Raspberry to be exact... It was too easy... The berries went in, filled the hopper, pressed down with the tool, juice and pulp drained down and the seeds and other stuff came out the end. That was it, that easy...DONE!

 A bright light appeared in my kitchen that day, it was the time saving idea light... I had finally found the one item that would save me THOUSANDS of HOURS of intensive labor to process berries and tomatoes. I can do a bushel of tomatoes in under an hour, that is from washing, cutting and processing them for canning. Now that I have this, I use the time I save and my shoulder for other projects that need attention.

I don't know about you, but some jam like Blackberry/Raspberry can have way too many seeds for my liking, but at the same time they don't feel like homemade jam to if there isn't some seeds in it. So I dump one big tablespoon back in each batch I do.

Trust me when I say " don't let the price fool you, it's well worth the investment ". If by chance you don't have a Kitchenaid mixer yet, get one!!! I love mine!!

Saturday, August 6, 2011

Dehydrating, Dealing W/ Bumper Crops, Secret Tip, The Recipe

This time of year most folks love to share the fruits of their labor with others. So many people bring in food from their gardens and give it to co-workers and such.

NOT ME!! If you now suspect that I am just a grumpy old man, that isn't true. However, I do like to share some of my food with others and love to fellowship and share with certain folks. I process all my own food, and I deal with my bumper crops differently than most people.

Some people do get what I am doing, and I gave a friend some Jam, only to find out they didn't use it because it was home processed. I know right? But it was the first time, and the last I shared my food with them.

This time of year, its Cukes and Squash... I know that mater time is just around the corner when bumper crops of these two veggies head for the dehydrator. Cukes have tons of canning ideas, my focus in this article is Squash.

Zuke and Yellow are two of the most produced squashes in gardens. People love to grow them with little to no care, plant the seeds and off they go. I find that most people give away squash and maters, and from time to time Okra. NOT ME!!!


You know by now I love to process and store my own food, and you want to learn from my adventures and share your own ideas. To prep my squash, I clean it, cut the ends, and set my slicer for 5/16 of an inch. Now it is not wise to dehydrate big squash without a little bit of work, but armed with an egg cup, you will now be able to store and keep more food than you ever knew.


Yes, for this article I am going to use the word pith, it is the only word I know that I can described the center of a squash that has mature seeds in it. Now, having seeds in dehydrated food isn't a crime. The criminal here is mature seeds. Seeds are self contained units, and if activated, will ruin mass amounts of food stores. Now if your storing them for seeds that is different, as the end use is much different.

 Allowing mature seeds to be left in can not only ruin food, but also contain natural chemicals that will off set the flavor of your food. So armed with a egg cup, I remove the pith and mature seeds so that I can continue to save the squash for dehydration.I put up 23 pounds of squash in one go using my Excalibur 3900.

Some will say this recipe has been in many families recipe book for generations, as for a modern pioneer, our methods of food storing do change when a new way allows for better food storing. With that, food recipes and the desire to make our own comfort food makes us change our recipes to adapt to our new ways.

I am positive some of you growing up on a farm have spent many summer nights at the table with a bowl of squash mess. I know this time of year it was a near staple fixed on the grill in a cast iron pan over hardwood fire. We never cooked inside unless it was early morning in the summer. So I gave my hand at making this recipe with dehydrated food. After trial and error, I have developed the recipe and process.

11/2 cups each of dehydrated yellow and zuke squash
1/4 cup dehydrated onions
dehydrated garlic to taste
2 1/2 cups of veggie stock or chicken
2 tablespoons of butter
3 tablespoons of flour
salt/pepper to taste

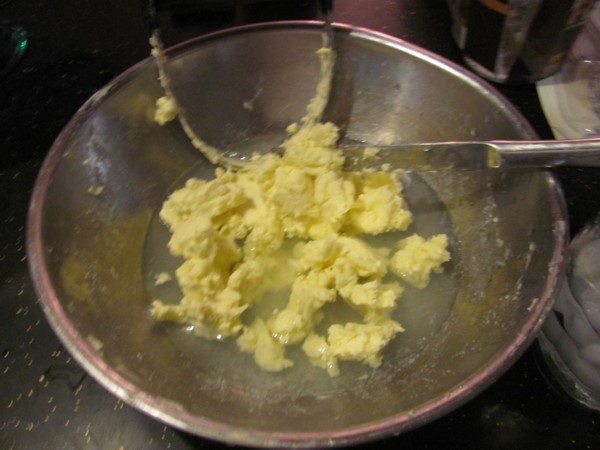
Put stock in fry pan, add squash, simmer for 20 minutes over medium heat. Increase temp to high, cook off remainder of stock liquid, turn back to medium, add butter, when squash begins to turn brown add butter, when butter melts add flour and return to high heat until the flour is brown.

I tested this recipe throughout the winter making as many as 8 to 12 side dishes. From the first to the last, outstanding!!

Sunday, July 24, 2011

Keeping On Getting Back To Normal, Love Fresh Food

Hello SS folks, long time no post... However as I mentioned after my return from the coast, I am presenting you with the photos of the homestead and where I am at with things.

So we are doing great, and the weather has been bad. With almost no rain, my rain barrel has been dry most of the grow season. I have used both pond water and well water for the garden. The mulch I laid down has been a blessing. Like some of you, I have been getting on with my seasonal duties of putting food up for the winter season. Although I have been eating more veggies since the garden has been growing, I drop almost 25 pounds of fat. Stress fat as well as process food eating I am sure. We all know the difference in the taste of market food and your own.

Well, all that being said, I'd rather explain the photos as they posted. So if you have sometime and want to join me on my adventure of my SS lifestyle, grab a cup of tea or your preferred drink and lets have a mozzy on the farm.
Mushroom Logs setting idle, waiting for some rain
http://i608.photobucket.com/albums/tt169/modern_pioneer/IMG_3362.jpg

Wind spinners which help run the birds off and add some beauty to the garden
http://i608.photobucket.com/albums/tt169/modern_pioneer/IMG_3388.jpg http://i608.photobucket.com/albums/tt169/modern_pioneer/IMG_3387.jpg
http://i608.photobucket.com/albums/tt169/modern_pioneer/IMG_3363.jpg http://i608.photobucket.com/albums/tt169/modern_pioneer/IMG_3364.jpg

Solar lights in the garden. 4 corners have led colored globes, and again the bean tree fence post topper
http://i608.photobucket.com/albums/tt169/modern_pioneer/IMG_3370.jpg http://i608.photobucket.com/albums/tt169/modern_pioneer/IMG_3371.jpg

Garden Guard
http://i608.photobucket.com/albums/tt169/modern_pioneer/IMG_3366.jpg

Garden pictures of different crops and general garden stuff
http://i608.photobucket.com/albums/tt169/modern_pioneer/IMG_3379.jpg http://i608.photobucket.com/albums/tt169/modern_pioneer/IMG_3374.jpg
http://i608.photobucket.com/albums/tt169/modern_pioneer/IMG_3369.jpg http://i608.photobucket.com/albums/tt169/modern_pioneer/IMG_3372.jpg
http://i608.photobucket.com/albums/tt169/modern_pioneer/IMG_3373.jpg http://i608.photobucket.com/albums/tt169/modern_pioneer/IMG_3375.jpg
http://i608.photobucket.com/albums/tt169/modern_pioneer/IMG_3380.jpg http://i608.photobucket.com/albums/tt169/modern_pioneer/IMG_3382.jpg
http://i608.photobucket.com/albums/tt169/modern_pioneer/IMG_3378.jpg http://i608.photobucket.com/albums/tt169/modern_pioneer/IMG_3368.jpg
http://i608.photobucket.com/albums/tt169/modern_pioneer/IMG_3377.jpg

Ground Hog enters garden and eats carrots and beans, I will harvest and stew him soon
http://i608.photobucket.com/albums/tt169/modern_pioneer/IMG_3381.jpg http://i608.photobucket.com/albums/tt169/modern_pioneer/IMG_3376.jpg

Early Garlic processing
http://i608.photobucket.com/albums/tt169/modern_pioneer/IMG_3339.jpg http://i608.photobucket.com/albums/tt169/modern_pioneer/IMG_3342.jpg
http://i608.photobucket.com/albums/tt169/modern_pioneer/IMG_3418.jpg http://i608.photobucket.com/albums/tt169/modern_pioneer/IMG_3416.jpg

Onions
http://i608.photobucket.com/albums/tt169/modern_pioneer/IMG_3429.jpg http://i608.photobucket.com/albums/tt169/modern_pioneer/IMG_3425.jpg
http://i608.photobucket.com/albums/tt169/modern_pioneer/IMG_3427.jpg http://i608.photobucket.com/albums/tt169/modern_pioneer/IMG_3428.jpg

Summer and Zuke squash, dried and ready to be separated into my squash mess vac bags and other cooking recipes. I have a long loved squash mess recipe from my Mom that she taught me how to make. I took it one step further and developed a dehydrated recipe of my own.
http://i608.photobucket.com/albums/tt169/modern_pioneer/IMG_3422.jpg http://i608.photobucket.com/albums/tt169/modern_pioneer/IMG_3420.jpg

Jamming.. Maple syrup too..

http://i608.photobucket.com/albums/tt169/modern_pioneer/IMG_3404.jpg http://i608.photobucket.com/albums/tt169/modern_pioneer/IMG_3403.jpg
http://i608.photobucket.com/albums/tt169/modern_pioneer/IMG_3402.jpg http://i608.photobucket.com/albums/tt169/modern_pioneer/IMG_3401.jpg
http://i608.photobucket.com/albums/tt169/modern_pioneer/IMG_3407.jpg http://i608.photobucket.com/albums/tt169/modern_pioneer/IMG_3400.jpg

So let me set this up and explain to you how some people don't think. At the end of maple season, folks are tired and couldn't be bothered working out the "fines" in the last gallon of syrup. Fines are named as all the small particles left over in the last batches of each go at maple making. They were going to toss them out this year, I got my equal share already, and wanted the stuff they were going to throw away. Anyway, what you are looking at is one jar of the left over "fines" syrup. Somewhat darker than Amber, still a good quality syrup, this jar is 90% maple syrup with the fines settled at the bottom. SO letting it settle and removing the top syrup has given me another half gallon of syrup.
http://i608.photobucket.com/albums/tt169/modern_pioneer/IMG_3397.jpg http://i608.photobucket.com/albums/tt169/modern_pioneer/IMG_3413.jpg

Todays harvest
http://i608.photobucket.com/albums/tt169/modern_pioneer/IMG_3423.jpg

The root cellar seems to keep at a steady 66 degrees and was a rewarding building project for food stores. It has proved to be a great place for me to safely store both dried foods as well as canned food.

The hedge rows have provided a steady supply of berries for jamming and fresh eating. This year is the first year that grapes are growing. some of the later raspberry plants are still providing berries of pancakes and sugar and milk.
http://i608.photobucket.com/albums/tt169/modern_pioneer/IMG_3390.jpg http://i608.photobucket.com/albums/tt169/modern_pioneer/IMG_3389.jpg

I suspect that I will be drying and canning tomatoes very soon. I will be canning green ones as well. I also will be drying some for soup recipes.

You can take the boy out of the country, but you can't take the country out of the boy.
вегетарианец- Russian word for poor hunter
We are pioneers, trail blazers, we fight for freedom. We transform our dreams into the truth, our struggles, we became a nation.