Showing posts with label how to. Show all posts

Wednesday, August 14, 2013

The False Idea on Freezer Food, The Food Storage Basic's Part 1

People love to get great deals on food that comes on sale, fruits, vegetables and meat alike. It is almost a no brainer when it comes to food cost and sales.

Long ago the process to keep food was less healthy and affordable than today. From Vinegar, Oils, Dehydrating, Smoking and Salt Curing, these methods were used and passed down for hundreds of years. Today, in places you might visit, cured meats and sausage hang. When you walk into these places two things happen, your repelled or your mouth begins to water.

While in Italy, I walked into a meat store while passing through a small town. Off the beaten path, I knew I was in a place that not very many visitors came by and it was a place of locals only. The pungent smells hit me first, it was kinda different, then I started to smell the layers of different smoked and cured meats.

Dust laid on some of the meats as if they were just left there, unsellable for what ever reason. My education told me they were longer term curing meats and might be ready now for the harvest. The woman, having a brown stained dress on, a thick cotton, came up and started to greet me. I said hello and passed by her to look and ask her about some Pepperoni I spotted.

She made her way back to the counter where a drawer was, she pushed it in and walked to a cabinet and opened it to reveal walls of hanging cured meats. Some had been sliced on a few times, some new, some whole. I even spotted some cheese and fish.

The reason I tell you this story is so that you understand that meats can be stored and cured, even today it is still used. However, it has to be done right.

For now I want to cover a few basic things, long term and short term food storage for the average person or some one who is just starting out at food storage. The one book I found useful in understanding long term or alternative preserving is this book.


Preserving Food without Freezing or Canning: Traditional Techniques Using Salt, Oil, Sugar, Alcohol, Vinegar, Drying, Cold Storage, and Lactic Fermentation


Second, I want to get your ear on something that is misleading and although generally not a common case, but is for preppers, homesteaders, gardeners and folks who just want to plan cheaper meals it is a great concern. Salt cured meat and freezing.

After reading a article in Meats published by Hobby, it was brought out that meats like sausage, bacon and other salted meats will go rancid and decay after awhile. Before this article, it never occurred to me that  meat would go bad, even if vac packed and handled properly. The Author of the article went on to explain, and then all sorts of light bulbs started going off.... 

As I read, it dawned on me, about the funny taste my own sausage had after 7 months in the freezer. I had not eaten much of it, the tainted meat, but enough to know it wasn't right so I stopped eating it. Then I started to ponder the salt content and how that would stop the meat from freezing solid, like a rock or really hard. I went down and grabbed a slab of my own bacon from the freezer, not that bacon sits very long around here. But I did a flex test on a package. I had preserved it correctly, I was confident in my workmanship and knowledge of processing the bacon. 

So I let a few packages of that old sausage in the freezer and tested it several ways including cooking it and smelling it against the same recipe but fresher, 3 months fresher. I also did a package push test on the meat, while still vac packed. I found that the sausage that was older, the outside of the meat, although just a thin layer, pushed around easier than the fresh sausage which didn't have a layer to push around. 

I cover this issue more in depth in one of my Food Storage Workshops on-line. I mention this today because so many people are starting to buy bulk and perhaps not think of this or not rotating their freezer stock often enough. 

Be sure to check out Part 2 in this mini series, The Food Storage Basic's. I will be covering Dehydrating methods, processes and debunking some of those myths and wives tales. You will learn long term and short term approaches. I will toss in a few good long term recipes to boot...
 

Saturday, October 20, 2012

Raw Milk Turns Into Many Homestead Products

As I sit here this evening, while the cool fall air swirls around the trees to pull off the dead leaves and floats them to the ground, today was a good productive day.

You might remember the other night I went to a secret location and got some raw, right from the cow, milk. Now before you start posting your thoughts of how bad raw milk is for you, I will not listen to your nonsense. Your wasting your time preaching to me about all the things bad with raw milk, and if I wanted to waste my time I would combat and debate the issue with you. But I am not going to do that.


As I used a method taught to me by my Mom, I had confirmed the technique of separating the cream from the top of the milk. So out of the milk I got I ended up with enough cream to make nearly three pounds of butter. You see I dodged that "how much cream did you get" bullet? I didn't measure my cream as I should have because I forgot to and just moved into butter production first thing this morning.

So, I know your ready to get into the whole butter production, but I wanted to let you know in my useful gadgets I have a Mixer Stand like the one I used to make my own butter. One of these days I am going to blog a list of stuff I make with my Kitchen Aid stand mixer.

So I started out by allowing my cream sit overnight and then just chilled it a couple hours. I added some into the stand mixing bowl, and kept adding until the mixer was going on high and I always make a foil bonnet around it to keep it full.


 So as it starts to churn, it will thicken up and the milk and as you can see in the photo below, the level of milk has dropped compared to the one above. Generally I just keep adding cream until I get enough where I know my machine can handle the butter.


So by adding foil around the edge, tucking it in, I can fill my mixer up pretty full without spreading milk all over the kitchen.


Taking a peek in, can you see the noticeable change it texture and color?


Well it won't be long until my butter starts to clump and balls together. When it is at this point it is time to take it out and strain it.


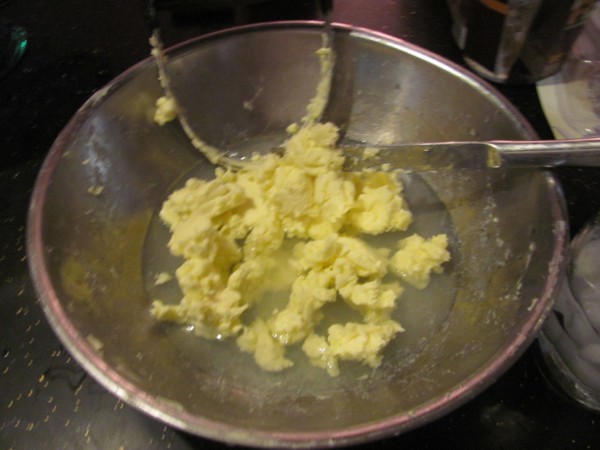
Now it is time to start cutting the butter, if you don't cut it, it will become rancid very soon and you have wasted all your cream, time and effort. Cutting the butter with a pastry cutter and cold water will clean out all the residue milk that has been collected during butter making process. Ice cold water added, than cut it for a couple minutes, strain add new cold water, and repeat until your butter cuts clean in water. I use 1/2 cup cold water during my first cut and mix that with my buttermilk. The remainder several batches after the first one I toss out.


This is my last cut, clearly from the first photo you can see the water color get much clearer.


Now I will strain the butter one last time and begin to press it into containers for long term storage. Notice the water coming out?


Don't be afraid to poke your fingers down into the butter to remove the air pockets and the water will also continue to come out. Now it is time to smooth it out for long term storage...


Some advice, never share your source for raw milk by bragging about it, share with people you know if the farmer allows it. Make sure to visit your farmer and make sure they are a clean milker. If your lucky as I am, mine doesn't use hormones and mine grazers and produce organic milk for the market.

So tomorrow for breakfast I will have homemade buttermilk (made from my by product from butter production) pancakes with my homemade butter covered in my homemade maple syrup.... I feel pretty proud to say all those homemade words in one sentence....


Wednesday, October 3, 2012

Winter Grains For Green Cropping in The Spring

As the weather gets cooler, the leaves start to die, the trees begin to fall asleep for the coming winter months. Daytime temps are a hit and miss as the weatherman tries to get us ready for the day ahead. The morning sun beams through the early morning fog as the dew drops from the blades of grass collect and drip.

The garden has given up the last of her bounty, and it is time to take down all that garden art that served to allow plants to grow and produce its food for collecting. Reflecting back to this years harvest, it has been a good year and the garden produced plenty of food as I had planned during the early spring.

It is time for me to get it cleaned up and till the soil over to turn in the skeletons and the last of the vegetable plants and the weeds that I allowed to finally win their space in the garden as it didn't seem important to pull out any more. A time does come, as a gardener, to just realize the garden is at a point where weeds can be allowed to grow.

A custom mixture of my own Grains and Legumes have been mix together and are now ready to be planted and allowed to grow before the winter snow comes. It is important to plant green crops so that in the spring it can be tilled in and nutrients from the green crop like nitrogen will be present. Side by side with my brown leaf compost that I will start building this fall, my garden will have a wide range of organic food to base my garden off of next year. Along with Chicken poo and cow manure, my garden will grow well again next year.

Here is a great mix that you can purchase already made for you. 


Saturday, September 29, 2012

The Meal, Pioneering With Children....

As a child, we as a family would go camping and fishing along the river banks of many rivers in two states. As we traveled or stayed at camp, we had sandwiches during the day but we always had breakfast and dinner on a open fire cooked in cast iron pots and pans. Often these meals were one dish meals..

Sometimes during the day we had to gather firewood for the fire that needed to last through the night. We tried to always keep a clean camp, but you know how that goes. I remember sometimes rubbing dish soap on the bottoms of some aluminum pans before Mom would cook on them over the fire. But 90% of the time she cooked on cast iron. Fried taters were almost a staple for us as were many non meat meals.

We did have a cooler to cart stuff around and they would go to the store when needed to get stuff. I had many Dutch oven meals, chili and corn bread, stew and biscuits, pot pie, shepherds pie, cobblers the list goes on. Having a fireplace or a place in your backyard to build a fire, you can create a simple one dish pioneering meal with your children or even a relaxing date and change it up a little. But allowing your children or grandchildren to help out will create wonderful memories that they will carry with them all of their lives. After dinner, roast some marsh mellows or try my fav, roasted pineapple over an open fire....

 So the next time power goes out, even if comes back on. Don't travel to the next town over, have a fun time cooking on a fire with your family or friends.

Monday, September 17, 2012

So Your New To This and Your Looking Where To Begin?

Like Peddlers peddling all sorts of Elixirs for everything that is wrong with you, so are people blogging and giving the information they know or think to believe to be true.

Recently a community member said you didn't need to buy books, everything was on the internet for free.. So than I posted a photo of a home library with a quote from Cicero "If you have a garden and a library, you have everything you need." I know there is a lot of bogus material out there, I know there is a lot of people not evening do what I am doing and sitting in their home just posting and not living the life they suggest they are living.

Here is the deal, I am a real person, with real idea's, that is living and sharing how to be more self sufficient as I desire to be. I am not going to tell you what level to live it on or where you need to be, that is up to you. If you just grow a tomato plant and that makes you happy, right on. If your sitting up in the middle of Canada's back country, off grid, in a Yurt  and your living your life they way you want, right on. My goal isn't to push any one more into being SS (self sufficient), my goal is to show you how you can do it if you want.

So am I going to do things wrong sometimes? Yes, although I strive to end my task to be fruitful and moving forward with my SS living, I make mistakes. When I make them, I admit that I made a mistake and try to move forward with a solution or take it as a lesson not to do what I did. Do you remember the anti-chicken rat traps I made? That was a flop and a costly mistake. Problem was I didn't think like a rat and so I solved the problem another way and now my coop is rat free.

So, what advice do I have for you on your first step? Decide to do it or not. If you decide to take it on (any level), remember a few things. Your going to have to get dirty and do some work. Your going to have to read, and a lot of it. Your going to have to understand, and not be afraid of failing, face it your going to make mistakes. The amount of tears that have made mud puddles in front of my knees are uncountable. You just have to roll with it and make your way through it. Remember what I said a few years ago? Making a mistake means that at least your trying to do something to change the out come of how your living your life right now.

Now make a plan and write it down, Danielle has a list that says "make a list for this" no kidding, but look write it down and hang it somewhere and look at it for a couple days.
1. What is your end goal?
2. At what level do you want to live SS
3. Are you willing to make small investments and gather materials from where ever to make stuff?
4. Are you willing to ignore the silly comments your family/friends might make?
5. Why do you want to change?
6. Can you see yourself working hard earning your way through hard work?
7. At what level are you willing to give things of comfort up, in exchange for less but more rewarding?

When you read these over and over, hang them by the can if you want, talk to yourself about them.

If you asked me some years ago about my proudest moment, and I have owned land and property before. But what I was most proud of, I would have told you it was buying my land. Today that question has a very different answer. Today I am proud of yesterday because I made a choice and I decided to stick with it through injures, tears, sweat, failures, property disputes, risk, and accomplishment. My land has shaped me as much as I have shaped it. It has given back to me what I have given to it.

When you step forward, I will suggest a book for you to start from. Why? Time tested methods of doing the task the way they explain it. It will teach you many different aspects of living more SS. Once you thumb through it a few times, start writing down some things you want to change, now you can begin.


Friday, September 14, 2012

The Birth Of The Smoothie

There are a few dishes that sit on my table today as did when I was a child. It is sometimes wonderful how we relate food today and the memories from our childhood, sometimes it isn't.

Traci, my sister can correct me on this one, however I am sure it was in October of 1978. We lived in a shanty in a small town in Clarksburg Pa. It was once a sturdy home, left to time and rented without up keep. The coal door still opened as we would feed the coal furnace from the basement and the coal truck put coal through that door. I doubt that at any time in life of that house was it ever warm during the winter.

I had returned from shoveling coal into the furnace as I was told to do, steam in the air, windows covered in condensation, the old brown TV with a fuzzy picture of the evening news was on. Traci and I often peeled potatoes as well as help Mom prep dinner as she had a full time job.

Dinner time in our house was that, all the family come together, sit, ask for people to pass around stuff. It was a Friday evening and Bobby's two children spent that weekend with us. So with 4 children, when Mom shouted dinner, the whole house seemed to rumble and shake as we made our way to our seats at the table. But this night it was a quiet "drag" to the table.

It isn't my fault if your having your own flashbacks by this time, perhaps, but let me tell you more.

Bobby and Mom thought a good meal was a meal where you would have to eat stuff that children think is gross. It doesn't matter how it was cooked, it was just nasty. Bobby's pick that Friday's meal, saute' liver and onions... with mashed taters...

I tried for an hour to climb my way through this meal, it was nothing smaller than Mt Everest, and almost no place to drive my fork in. It was cold and harsh, but Mom just kept pushing forward... Your not leaving that table till your plate is clean.. I remember listening to the clock tick as if minutes were hours...

As  time past, I was alone in the kitchen while every one else fought for a spot to watch TV. Mom went in and put her night gown on... I knew better to waste the food, that is the real reason I didn't try to out smart my way through it. I wasn't a very clever child either and knew I faced a spanking or worse if I did get caught. Then, with a sad face as I looked at her, she said right....

Mom was a War baby and was raised by her Mom and a nanny as the story was told to me. So she had some of that hard liner and dry humor about her that had been caste into her as a young child by a Brit Nanny.

The blender was pulled out, she grabbed my plate, scrapped it into the blender, she came back and grabbed my golden Tupperware plastic glass which was filled with whole milk. In it went like she was a master chef creating a master piece... The blender bogged a few times at the start... than it ran...

She filled that same glass up, placed it before me and ordered me to drink it. I did so in total fear that she was about to become a monster.. Than she filled it up again until the blender was empty, again she ordered me to drink it, but this time my gag reflexes were about to explode. I lifted it up slowly, and couldn't get that liver infused milk drink taste out of my mind. I was crying and begging my way out of it, but I was stuck...

So the birth of liver and onions smoothie was born... The taste test didn't do so well, so it never became a popular fade diet or smoothie...

PS Please look at the labels I have attached to this post....


Friday, September 7, 2012

How To Make Your Own Breakfast Sausage W/ Recipe

Memories of smelling bacon from downstairs always woke me up and made my tummy growl. At home on the farm, it was a frosting designed window as I looked out the window at the sun rising. At Grandpa's it was a cool morning in Hornsby Hollow, and the sun was up and the chickens were calling out to be let out. Isn't it funny how we can recall memories from smells?

Well, I am creating new smells for my children, and from my own recipes, local meat, and organic seasonings, so which I will add were grown right here on my homestead. Seasonings are troublesome for me as I can grow a lot, but some I can not and I rely on other suppliers, so I do the best I can to research my sources.

So lets talk about breakfast Sausage, why? Because I want to do something different and there is a very limited selection out there, and the ones that are out there that are links, some of them are so processed they aren't even sausages....

Ѽ  How about a couple things found right on the Homestead? How about some Maple and Apple Breakfast Sausage links?

4 lbs of lean pork
1 1/4 pork fat
6 tsp. garlic powder
2 cloves fresh garlic
3 tsp. crushed Sage
3tsp black pepper
1 tsp of celery seed
2 tsp of smoked paprika
1 tsp marjoram
2 tbsp of dried parsley
1/2 apple sauce
1/3 cup apple juice
1/4 cup maple syrup
3 tbsp of lemon juice
 34-36 mm casings  ( I like New Zealand Lamb casings)

Cut and grind meat and pork fat to a fine texture together..

In another bowl, blend spices add apple sauce/juice and lemon, mix well. Add bowl ingredients and meat and mix at room temperature until well mixed. Put it in the fridge and let it set 12 hours.

Soak your casings and rinse them several times...

Stuff the meat into casings to 5 or 6 inch long links, or make into patties.... Freeze or use within a couple days.


Saturday, September 1, 2012

The Old Canning Jar Project, Be A Interesting Host

I want to get right into it, and I am willing to share the links after we stroll through the project so you can get those products if you want or bookmark this page to follow up on a later date.....

So I only had a few jars that I could no longer use for canning, I donated the other two to make this project practical and fun. I did this project outside....

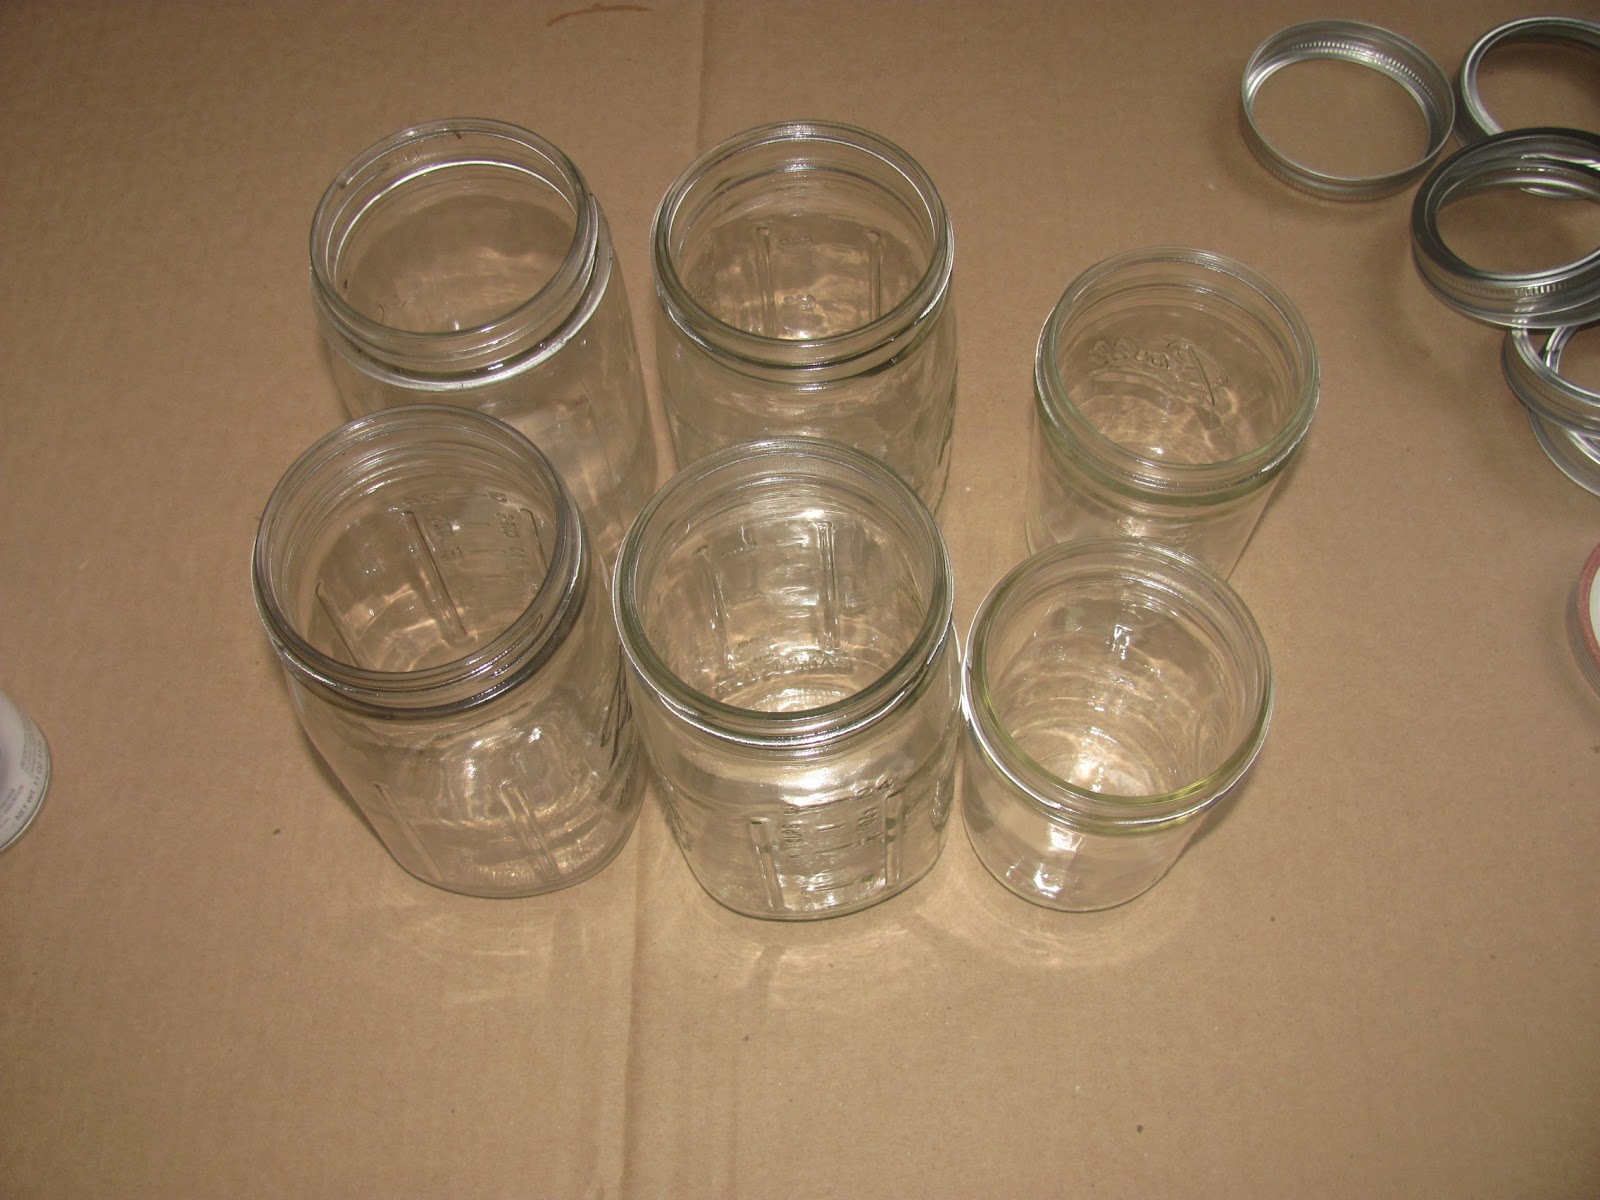
I started out with a few different jar sizes, but they have to be widemouth in order to make this project work.


I know the original idea, no I didn't make this up, had said to spray the outside of the jars, but the flawed idea behind that is that you can only get Interior Frosted Paint...


So I decided to spray the inside after I tested it on the outside where it was exposed and scratch very easy. I jumped in and started spray and the runs showed up. So I lightly sprayed the inside a few times.


I let them dry and opened the lights, I got these on the fly from the Flea Market last week, but I discovered even cheaper ones that function even better and have more lights. Well that happens sometimes, and I will share that link with you.


So I opened them by twisting them apart to locate the two sided sticky tape and remove the pull tag so they will light up.


I pulled the tag, removed the double stick doughnut.... I twisted the light back together and applied the double sticky doughnut to the back, and removed the protective tape on the other side.


I took one lid and fastened the light to it....


I did this for the rest of my lights.... So I had to test them to see what they looked liked, even though it was daylight....


Pretty dang cool looking... So to save the photo by photo, let me explain, this is a great idea. You can Host a party and have these so people can see a path, see steps, use them to draw attention to a nice area on your property during a party, boundary lights, use any season and have one on the night sitting table....


Tuesday, August 14, 2012

Ѽ Modern Pioneer's Original Apple Chip Recipe Ѽ

 With all the recent request for my Wonderful recipe, I decided to blog it..

Modern Pioneers   Ѽ Ѽ Apple Chips Ѽ Ѽ
1/3 cup Cinnamon
1 cup cane sugar
nice pinch of Allspice (heavier pinch if you want the taste to lean towards Apple Pie)
Pineapple juice
7 pounds of choice apples (use sour apples for sweet/s
our chips)

I use two thicknesses, just over 1/8 for crunching chips, 3/16 for less crunchy. Cut Apples into desired width, placing the fresh slices into the pineapple juice until you fill the bowl. No need to soak them as they just need to be coated with the juice. the juice has vitamin C which will protect the color.

Mix the Cinnamon, sugar and allspice together blend well. Sprinkle over apple chips already placed on trays. Then dehydrate until crispy ( ⌚ 8-14 hours)

If you want to omit the sugar altogether you can do that but the flavor will be much stronger, and I agree healthier as well. You can do this in a oven, but I am not sure how that would work.


If you want to make some really different fun chips, consider getting a spiral slicer like this one. Great for other dishes as well.

Thursday, August 9, 2012

Re-Claiming and Makng Useful Stuff (Pictures)

There is a lot to be said about keeping things you "might" use in the near future, then comes along the rules of how long to keep it. I know on at least a half dozen times, I have stuck to the rules. But wouldn't you know it in the near future I would need it. Sometimes, that is my luck... So I decided how rare or how many things could I use it for and what was the chance I was going to include it in a project.

I had some manure delivered a couple years ago, and the driver backed into my gate and crushed it, breaking off the post it was attached to. After bartering, I got another load for free and replaced the gate but I held onto the crushed one.

It was a 12 foot gate and too large to store, so I cut it down, did some tree pulling on it to pull out the bends as best I could. I attached a come-a-long with a strap around a large wild cherry tree and the other end to another big tree. Using a nylon industrial/farm strap, I positioned it several times along with the other strap to pull out the kinks. Some I couldn't get out, some I just repaired.

After I repaired them, I stored them away in my out building for a few years. They were out of the way because I hadn't remembered them until I needed them. When I built the new coop pen, I used both of the now two parts for entrance and exit gates as you will see.

 So each gate would have been around $70 retail or more, and the installation went quickly. 


Now the finished product is keeping my Silky Roo in with his girls and the critters out!


Wednesday, August 8, 2012

Canning Those Tomatoes/Sauces and Better Sauce Ideas

While waiting for the bumper crops to start, those tomatoes start to come in. I love to eat the wonderful fruits as they come in the house, having that kind of reward is so wonderful. I have, through the years come up with many uses as has Danielle. Coming from England she brings with her a different pallet as well as fresh eating ideas.

Along with those big round bundle of joys comes the start of the Paste Tomato harvest, Roma's. I plant Heirloom Roma's which don't grow as big as the ones at the store, but are packed with 2x more flavor and meaty goodness. As the war against GMO's continues, I couldn't tell you the differences of nutritional values between the two because I plant Heirloom seeds.

A few years ago I bought a few Roma's at my local GMO peddler store. I cut mine open and compared them side by side. Mine didn't have such an even color, nor was its shape perfect. Mine was smaller and didn't weigh as much and wasn't as plump. When I cut them open I could see right away mine was more compacted and wasn't as juicy. But the color inside was as rich as the outside color, the GMO fruit was whiter and had more runny juice inside. It had a much better shape and even blotted color.

When thinking about a sauce tomato, consider water content and pulp content as these are important qualities when making good sauces. Starting out with a good quality Heirloom Roma is the first step in making a good sauce.

Once the Roma's start to come in, just before the bumper crop, for a few weeks you will start to harvest a few pounds a week. The rate at which they start to come in increases every couple of days. This period last a couple weeks in my zone, and so I have to prepare and process those early Roma's.

Often I will process the first ten/fifteen pounds and freeze the pulpy juice and when the bumper crops hit, and I am in full processing swing, I will thaw that stuff out and mix it with my fresh tomato sauce. However, in both cases I allow my homemade puree to sit in a stainless steel bowl, covered in the fridge, overnight.

If your making your own stuff, homesteading or just being frugal, time and money is the two things we want to reduce. This can also help make us a better product. By letting the homemade puree sit overnight, the water content of the juice rises to the top, allowing us to skim it off so that it isn't stirred back into our sauce, reducing energy and cooking time to make a quality, thick sauce.

Even after canning, compare my approach to your traditional sauce by setting the two jars side by side on a shelf for a few days. You will see how much less water content my method has. Also your sauce will be thicker, richer and you will use 30% less energy making the same amount of product.

Although I adjust the Spaghetti recipe a little, I use the one found in Ball's Blue Book.


Sunday, August 5, 2012

POOW__TAT__TOE Dehydrating


This food has long been the staple in many parts of world, and I believe has saved lives as much as ended lives. Stupid people are still building and shooting each other with potato guns. Then there was Black 47 in Ireland, again the source of people dieing and starving because crops were wiped out.

One of those frequent questions I am asked about is how to do potato in a dehydrator?

Lets talk about uses, and the first would be to make your own Scalloped Potato oven dish... Then there are skillet potato's, trail potato dishes, and they are light and store really well. They are really affordable and come in big ole bags that you can just dehydrate for a week and turn a 100 pound bag into 25 pounds of goodness.

The process is simple to address, but I suggest having a food slicer as you will be able to get lots done in a short amount of time. If all you have is a mandolin slicer, use it.... I clean them well and leave the skins on for nutritional reasons.

Get a bowl of salted water beside your work station, fill a vessel or sink with cold water add ice, put a pot large enough to dump your potatoes in on the stove on high, salt it as well.

Slice your potatoes just about 3/16 of an inch thick and place them in the salted water at your work station. As you slice the potatoes, place them into that bowl making sure enough water to cover them. Once you have finished them take them to the stove and put into your boiling water. Watch the water as it heats back up. Once it returns to a small boil, boil for 6 minutes, stirring gently and often to separate the pieces, drain and place into cold water right away. Rinse then one last time and rack them into your dehydrator and dry them until hard.....

Pictured here on the right as they are temporary place in a zip storage bag next to a box bought big manufacturers product, which looks starch white and unnatural to me. A few years ago I bought a box sample from Harmony House Foods, which is one of the largest dehydrating companies in the world, and mine looked just as theirs did. So don't get all worked up over the less white look of your potatoes, unless they look nothing like mine.   
Barry Farm does sell a dehydrated cheese that you can buy pretty cheap and make up your own recipe or use mine. Either way, this will be a rewarding dehydrating project/food store.


Saturday, August 4, 2012

Chicken Popsicle Hydrate Them With Water and Scraps

In the hot, dog days of summer, I am canning outside trying to keep the house cool. Nothing says farm work to me like a glass of cold Iced Tea, touch of lemon and just a tad of sugar to take off the bitter edge.

As a child we always had water and goats milk, but goats milk had it's place, and Iced Tea... Come in out of the garden, bailing hay, farm chores or fields, the cool glass of iced tea hit the spot. It still hits my memory buttons like it was yesterday.

Chickens are no different than hard working homesteader or farm hand. They aimlessly wonder to forage for bugs and find cool places to get a good dust and cool off. Their feathers keep the heat in and they need to keep cool.

So, you can keep your veggie scraps, chop them up, and add them with water into a flexible plastic container and freeze. I like to add a little scratch just so they know I love them. From green bean ends, swiss chard, blueberries, blackberries, squash and even tomatoes. Over rip strawberries in the mix makes my girls go nuts....