Showing posts with label dutch oven cooking. Show all posts

Monday, September 22, 2014

Cornbread ( 1830's) Kitchen / Campfire Recipe


  • 3 c.  stone ground corn meal
  • 1 1/2    c.  white flour
  • 1 T. sugar
  • 2 t. baking soda
  • 1/2 t.  salt
  • 2 1/2 T. molasses  or  21/2  T. honey  or 11/4  T. of each 
  • 4 eggs
  • 3 c.  buttermilk
  • 3 T. lard
  • 3  T. veg. oil

While preheating 12 inch cast iron dutch oven to 375 degree (use oven thermometer inside Dutch Oven , remove thermometer before adding batter to oven)
Combine dry ingredients.  Add molasses, oil and buttermilk to beaten eggs.  Add to dry ingredients and mix to combine.
Melt (pig fat) lard in preheated Dutch Oven, add ingredients to dutch oven.  Cover and bake for 30 minutes or until inserted knife comes out clean.

Dutch Oven Cobbler Kitchen / Campfire Recipe


  • 1 box of yellow cake mix
  • 1 cold stick butter cut into cubes
  • 2 cans pie filling
  • 1 1/4 c. chopped or finely diced walnuts

While heating 12 inch cast iron dutch oven to 375 degrees (use oven thermometer inside dutch oven/oven ) Remove from oven before adding ingredients’  Lightly grease dutch oven with cooking spray

Cut cold butter into cake mix and add nuts (optional) and hand blend (cut) the butter into the cake mix until the butter is in small pieces.

Add fruit to bottom of dutch oven.  Spread dry cake mix with cut in butter over top of fruit.
Bake in covered dutch oven for 30 minutes.


Sunday, September 21, 2014

Traditional Buckwheat (no knead)


  • 3/4  cup buckwheat flour (3  1/2 oz)
  • 1  cup unbleached all-purpose flour (5 oz)
  • 2  cups whole wheat flour (9 oz)
  • 2  1/4 t. granulated yeast
  • 1  1/2 t. coarse salt
  • 1/8  cup vital wheat gluten (2 T or .6 oz)
  • 1  3/4 cups lukewarm water

Using glass bowl or cup, dissolve yeast in lukewarm water.  Put buckwheat flour, wheat flour, all-purpose flour and gluten into large plastic mixing bowl, incorporate salt into flour.  Using  a wooden mixing spoon, add water with yeast to flour mixture, making sure everything is uniformly moist.  Dough should be wet and loose enough to conform to shape of container.  Cover with a loose fitting lid.  Allow mixture to rise for approximately 2 hours, depending on room temp and initial water temp.  Longer rising time will not harm the result. 
You can use a portion of the dough anytime after this period.  However, flavor will be best after at least 24 hours of refrigeration.  Any dough not initially used can be refrigerated in same bowl with loose lid for up to 10 days.
To bake a loaf of bread, sprinkle flour on work surface, divide with your hands, a grapefruit size portion of dough, dusting a bit of the flour on the outside of the portion of the dough, not really mixing any of the flour into the dough.  Most of the dusting flour will fall off.  Gently stretch the surface of the dough around to the bottom on all four sides, shaping the dough into a ball.  No kneading required.  The entire process should take no more than 30 to 60 seconds.  Place on parchment paper, cut to size of dutch oven.  Cover loaf with towel and let rise for 40 mins.
 Before placing in heated oven, dust with flour and make 3 slashes, 1/4 inch deep, across the top, using a serrated knife.  (if refrigerated dough is used, allow more resting time before baking).
The method of baking to be addressed here is to use a cast iron dutch oven (10 or 12 inch size).  One of 3 methods can be used for baking.  At home in your kitchen oven; or outside using either charcoal or wood coals.
While dough is rising, preheat dutch oven to approximately 500 degrees.  Use a trivet in bottom of oven, and preheat with lid on.  When temp is reached, carefully place dough (with parchment paper on bottom) in oven and replace lid.  Use insulated glove while doing this.
Bake for 35 minutes at 450 degree.  When using indoor oven, remove lid for last 5 minutes.  Carefully remove loaf from oven and place on cooling rack.  Slice at will.

Stan has been using this recipe for 28 years.... 

Honey Wheat (no knead) Dutch Oven


  • 1  1/3  cups lukewarm water (approximately 100 degrees)
  • 2  1/4 t.  granulated yeast
  • 2  1/4 t.  coarse salt (.6 oz)
  • 1  1/2  cups whole wheat flour (6.75 oz)
  • 1  1/2  cups  all-purpose white flour (7.5 oz)
  • 1/8  cup of vital wheat gluten ( 2T or .6 oz)
  • 1/4  cup honey (2.8 oz)
  • 1/4  cup lard (melted and cooled) (1.6 oz)

Using glass bowl or cup, dissolve yeast in lukewarm water.  Put wheat flour,  all- purpose flour and gluten into large plastic mixing bowl, incorporate salt into flour.  Using a wooden mixing spoon, add water with yeast, honey and melted and cooled lard to flour mixture, making sure everything is uniformly moist.  Dough should be wet and loose enough to conform to shape of container.  Cover with a loose fitting lid.  Allow mixture to rise for approximately 1  1/2  to  2 hours, depending on room temp. and initial water temp.  Longer rising time (even overnite) will not harm the result.
You can use a portion of the dough any time after this period.  Divide in half for 2 loaves. Recipe can be doubled for 4 loaves.  Any dough not initially used can be refrigerated in same bowl with loose lid for up to 14 days.
To bake a loaf of bread, sprinkle flour on work surface, divide with your hands a grapefruit size portion of dough, dusting a bit of the flour on the outside of the portion of the dough, not really mixing any of the flour into the dough.  Most of the dusting flour will fall off.  Gently stretch the surface of the dough around to the bottom on all four sides, shaping the dough into a ball.  Then stretching in gently to elongate it and taper the ends.   No kneading required.  The entire process should take no more than 20 to 40 seconds.   Place on parchment paper, cut to size of dutch oven.  Cover loaf with towel and let rise for 40 mins.
Before placing in heated oven, dust with flour and make 3 slashes, 1/4 inch deep, across the top, using a serrated knife.  ( If refrigerated dough is used, allow more resting time before baking).
The method of baking to be addressed here is to use a cast iron dutch oven (10 or 12 inch size).  One of  3 methods can be used for baking.  At home in your kitchen oven; or outside using either charcoal or wood coals.
While dough is rising, preheat dutch oven to approximately 500 degrees.  Use a trivet in bottom of oven, and preheat with lid on.  When temp is reached, carefully place dough (with parchment paper on bottom) in oven and replace lid.  Use insulated glove while doing this.
Bake for 35 min. at 450 degree.  When using indoor oven, remove lid for last 5 mins.  Carefully remove loaf  from oven and place on cooling rack.  Slice at will.

Artisan Dutch Oven White Bread (no knead) Kitchen or Campfire


  • 1  1/2 cups lukewarm water (approx. 100 degrees)
  • 2  1/4 t. granulated yeast
  • 2  1/4 t. coarse salt (.6 oz)
  • 3  1/4 cups all-purpose white flour (16.3 oz)

Using glass bowl or cup, dissolve yeast in lukewarm water.   Put flour in large  bowl, incorporate salt into flour.  Using a wooden spoon, add water with yeast to flour, making sure everything is uniformly moist.  Dough should be wet and loose enough to conform to shape of container.Cover with a loose fitting lid.  Allow mixture to rise for approximately 2 hours, depending on room temp. and initial water temp.  longer rising time (up to 5 hrs.) will not harm the result.  You can use a portion of the dough any time after this period.  Divide in half for 2 loaves.  Recipe can be doubled for 4 loaves.  Any dough not initially used can be refrigerated in same bowl with loose lid for up to 14 days.

To bake a loaf of bread, sprinkle flour on work surface, divide with your hands a grapefruit size portion of dough,dusting a bit of the flour on the outside of the portion of the dough, not really mixing any of the flour into the dough.  Most of the dusting flour will fall off.   Gently stretch the surface of the dough around to the bottom on all four sides, shaping the dough into a ball.  No kneading required. 
The entire process should take no more than 30 to 60 seconds.  Place on parchment paper, cut to size of dutch oven.  Cover loaf with towel and let rise for 40 mins.
Before placing in heated oven , dust with flour and make 3 slashes  1/4 inch deep across the top, using a serrated knife.  (If refrigerated dough is used, allow more resting time before baking.)
The method of baking to be addressed here is to use a cast iron dutch oven (10 or 12 inch size).  One of 3 methods can be used for baking.   At home in your kitchen oven;  or  outside using either charcoal or woods coals.  While dough is rising, preheat dutch oven to approximately 500 degrees. Use a trivet in bottom of oven, and preheat with lid on.
When temp is reached, carefully place dough,(with parchment paper on bottom) in oven and replace lid.   Use  insulated glove  while doing this.  Bake for 35 mins. at 450 degree.  When using indoor oven remove lid for last 5 mins.  Carefully remove loaf from oven and place on cooling rack.  Slice at will.

Stan has been making this bread for 28 years and this is a time tested recipe. 

Saturday, March 29, 2014

Meal Planning - 6 weeks at a time!

6 Week Meal Planner

My wife, Danielle, has recently created a 6 week meal planner, along with recipes, shopping lists and templates.  This is available as a PDF download that you can print off, and a printed version in a ring binder that you can add to with your own recipes. Order here: http://modernpioneer.highwire.com/product/6-week-meal-planner

This 6 week meal planner comes as 2 options:
  1. downloadable PDF for you to print at home, or
  2. a paper version that we can mail to you. The paper version comes in a ring binder.
This meal planner includes:
  1. More than 30 recipes, organized by cooking time
  2. 6 weeks of planned meals
  3. shopping lists
    • shopping lists are coded so you can easily edit for recipe changes or changes in schedule
    • includes pantry list for your staple food and non-food items.
  4. Extra templates to add your own weeks of plans
  5. Suggestions (but not recipes) for side dishes and breakfasts,.
The meals use a variety of cooking methods and times. They are adaptable and include freezer recipes for future prepping. Most are from-scratch recipes, but allows for you to substitute in your own recipes or pre-prepared versions.

 Order here: http://modernpioneer.highwire.com/product/6-week-meal-planner

Saturday, September 22, 2012

Dutch Oven Cooking... Bread Making

As I walk down my path in life, I find myself coming in contact with some real wonderful people. Some people like Stan, who does a lot of teaching others, has a passion for his work. He isn't in it for the money because he often volunteers his time for free. He doesn't lug around a case full of trinkets to sell or a selection of fancy cook books...

Instead, Stan carry's a couple of wooden boxes filled with a few pamphlets of bread recipes and tools to work his magical dutch ovens. A man that has walk down some rough roads in time, and has a humble attitude and is generally kind to every one. He enjoys speaking and answering questions and he really sets the tone for the class.

You can tell he is use to dealing with all different people from all walks of life... His steady teaching and answers really show off his teaching skills as every one stays focused on what he is sharing. Over the last two weekends I have spent time with him as a student. Even though I sometimes know what the task is and have mastered the task, it is always good to learn new skills from some one that has been doing it for 62 years like Stan has.

Stan is a regular volunteer at the Old Stone House in Slippy Rock PA  where he also dresses and performs time period dinners that include the correct period of dishes, cups, clothes, manners and food. When you stop by and visit there (a awesome historical place to visit with time period decor and people to explain everything) let him know you read about his awesome cooking skills here.

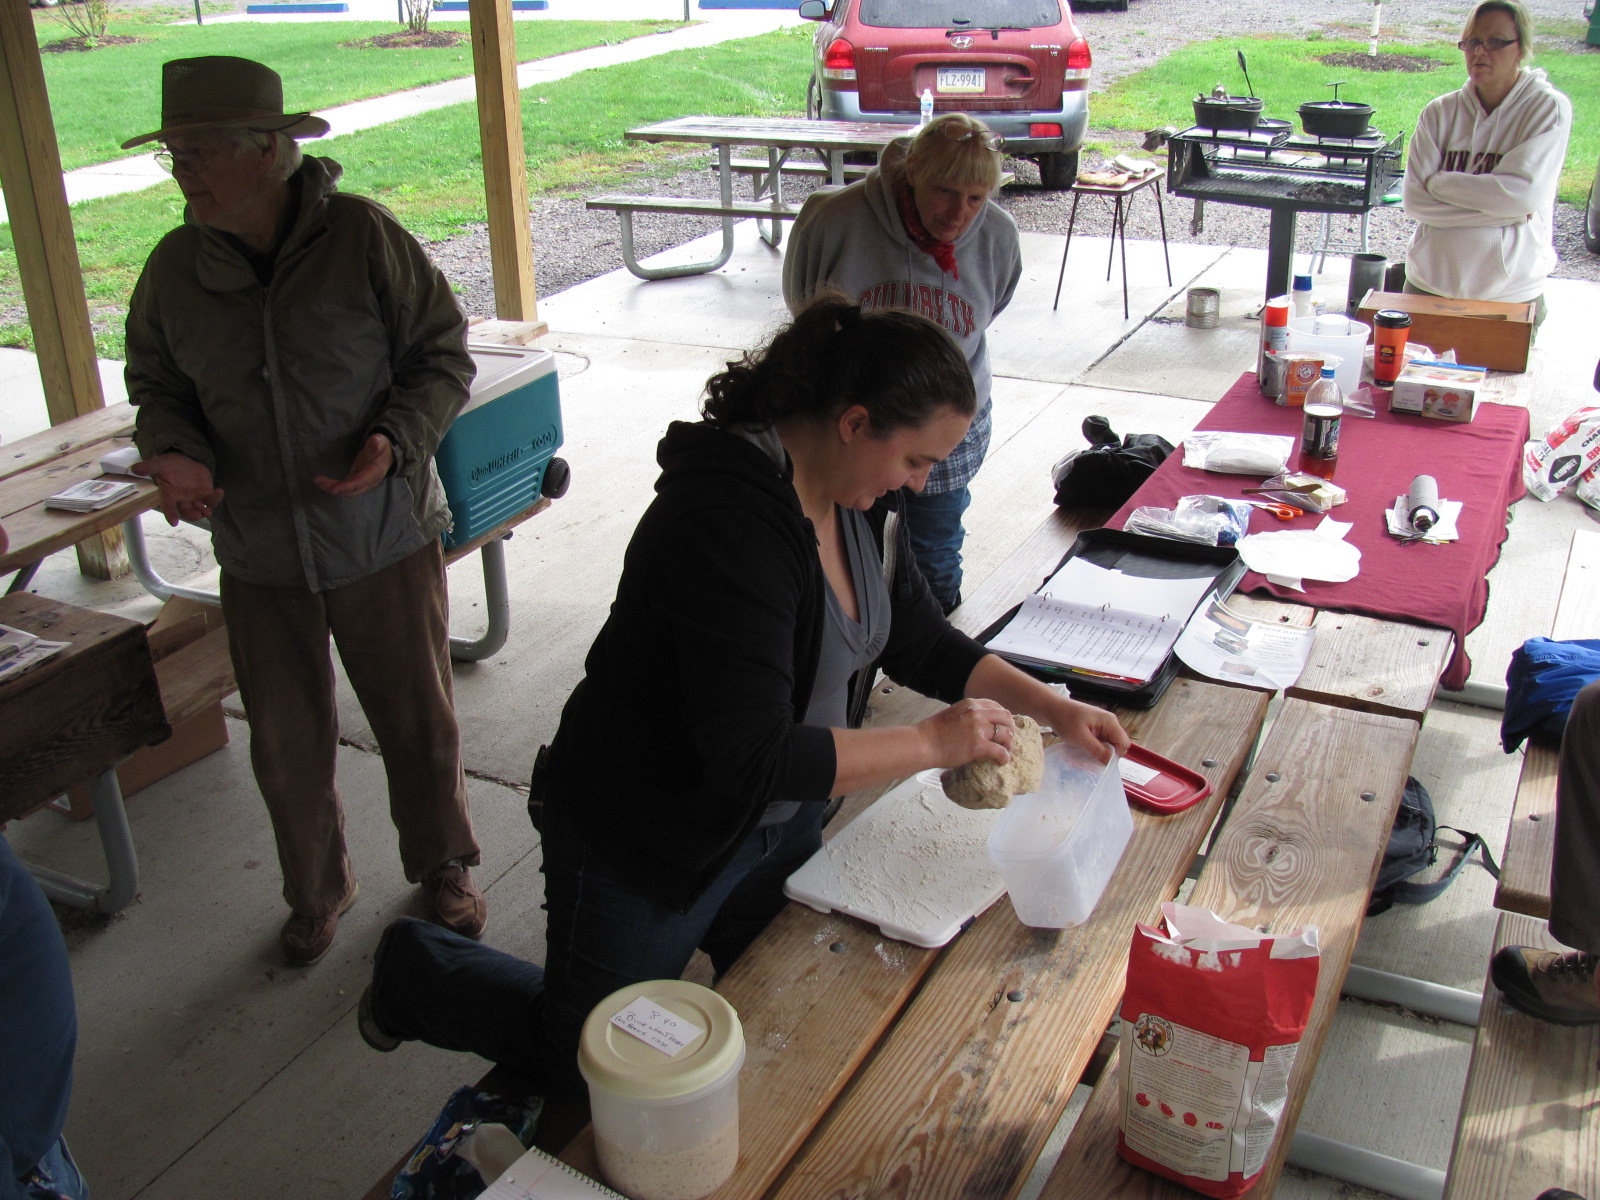
Here Stan is explaining the basics of no knead bread, the type of bread that we cooked in the dutch oven. As he explains, he shows samples that he made that students will start working with.


While Stan answers questions, he over watches his students repeat the technique of forming the bread to get ready to place on parchment paper.


Now that the bread doughs are formed, they sit waiting for the dutch ovens to warm up and get ready.


Adding the coals over and under the dutch of, and there are some rules as to how many coals to keep the dutch oven up to what temperature. But the hottest coals always go under the dutch oven when bread making. 


Some really hot coals that we started about a half an hour earlier in this quality chimney. Using a quality name brand charcoal ensures a more even burn when baking bread in a Dutch Oven. 


Using handles made made when cutting out the parchment paper, makes placing the bread dough into the 425 degree dutch oven quicl and simple.


As the bread cooks in the dutch ovens, Stan takes the time to explain the charcoal heating process and different times and approaches to baking it.


A QUICK PEEK, and I mean quick to see it baking, and hurry uo and place the lid back on the dutch oven so all the heat won't escape.


Now, it is ready to be removed from the oven as it shows browning, the smell is wonderful. Stan says if it smells like it isn't cooking, it isn't. If it smells like it is burning, it is burning. If it smells like it is cooking, it is.


How pretty is that!!! Perfection using primitive methods just shows you how luck we have it these days, but also how easy it really is. This loaf of white bread is hot and ready for butter and honey.


We also made this wheat bread, and I gotta tell ya, awesome.I do believe that Stan mention where he got these recipes, and I will share those with you later. He also said has made the Honey Wheat Bread recipe that Lewis and Clark used during their exploration


It was great and well worth the time to sit back and listen, I even learned a few things that I didn't know. I was in good company with like minded folks, and one couple that visited really found it a full on learning class. It was great watching them get excited and being amazed by a wonderful end product, by such a simple means..

I know that Stan took his 62 years of skill, trimmed off the fat and just taught us what is right. His cooking skills shined through the final end product. Every one left there more educated and amazed by his skills...